> For the complete documentation index, see [llms.txt](https://tutorials.kuasa.io/getting-started/llms.txt). Markdown versions of documentation pages are available by appending `.md` to page URLs; this page is available as [Markdown](https://tutorials.kuasa.io/getting-started/kuasa-ai-support-chat/contacts/manage-contacts/how-to-assign-person-in-charge-pic-for-specific-contact.md).
# How To Assign Person In Charge (PIC) For Specific Contact
1. Login to your account via .
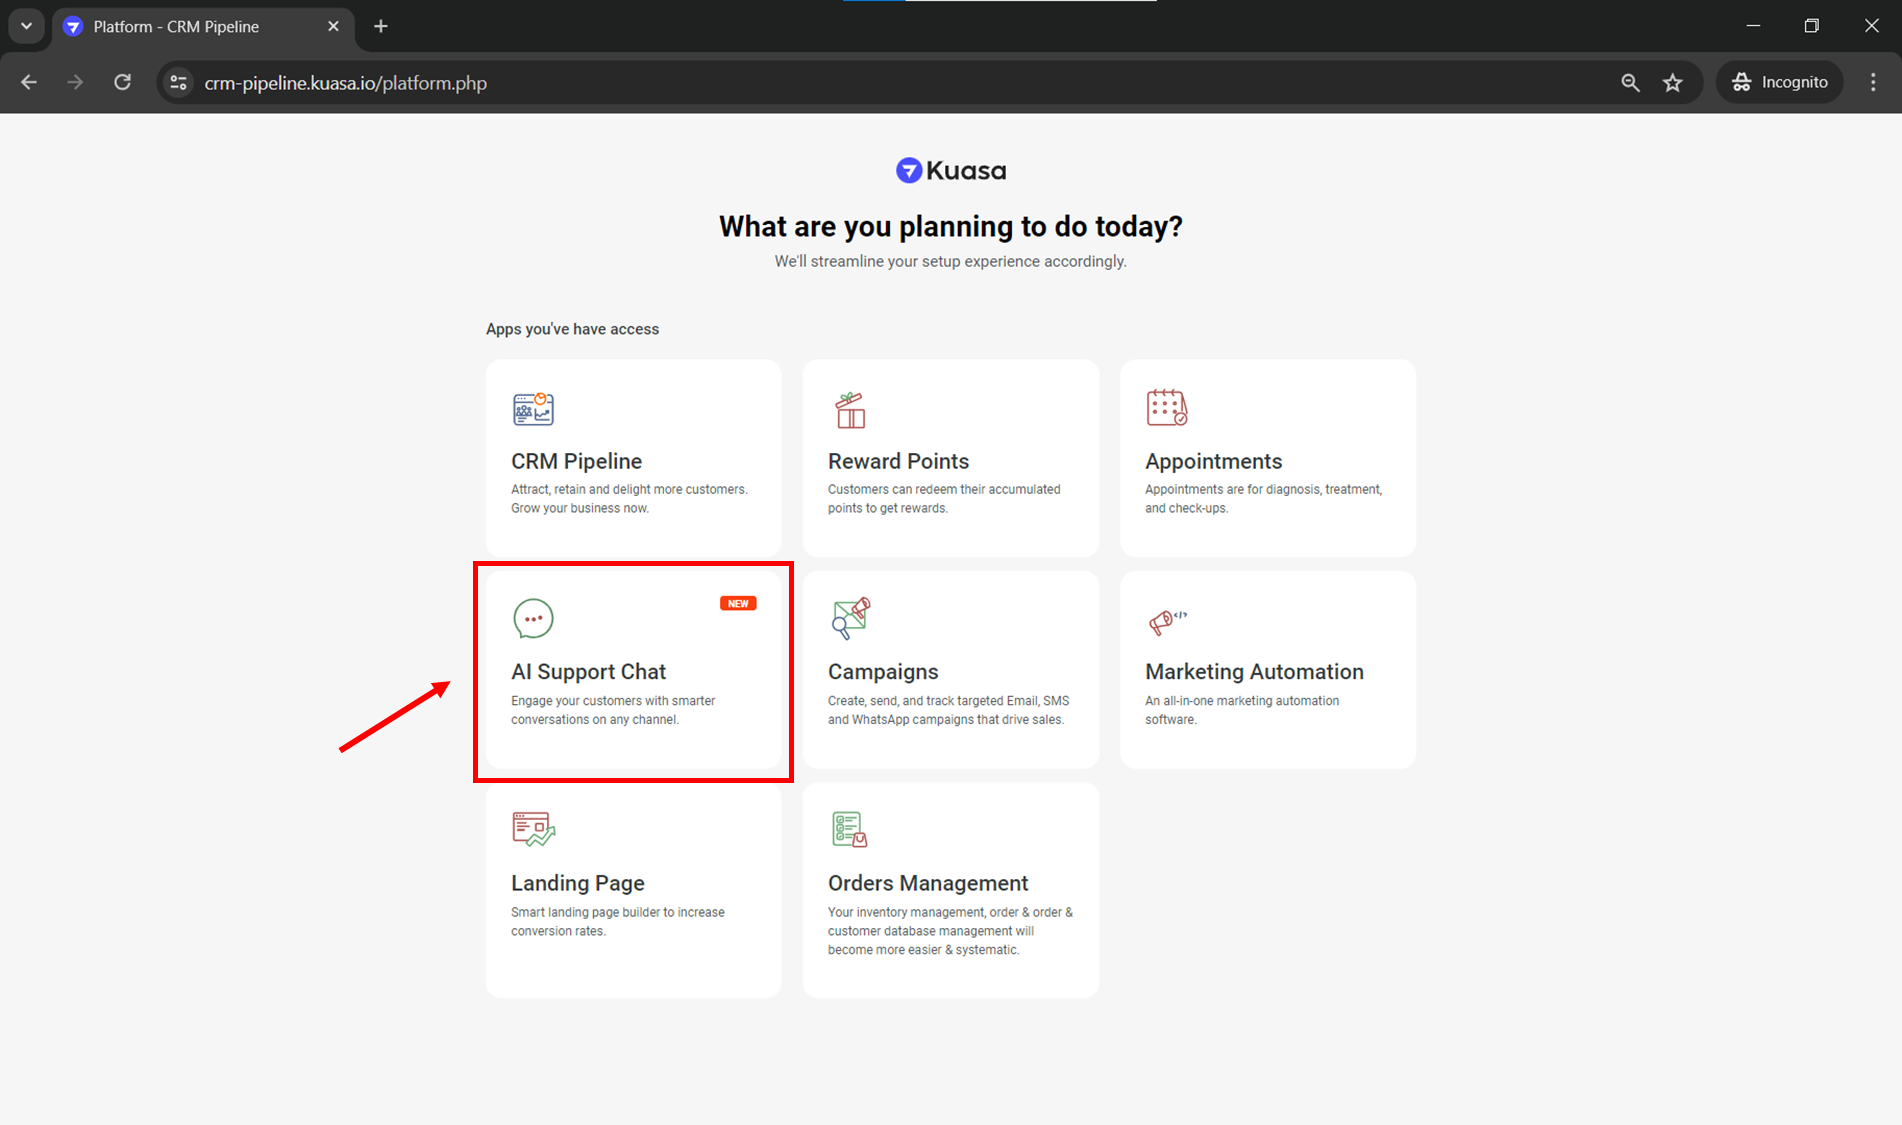
2. Click **AI Support Chat.**
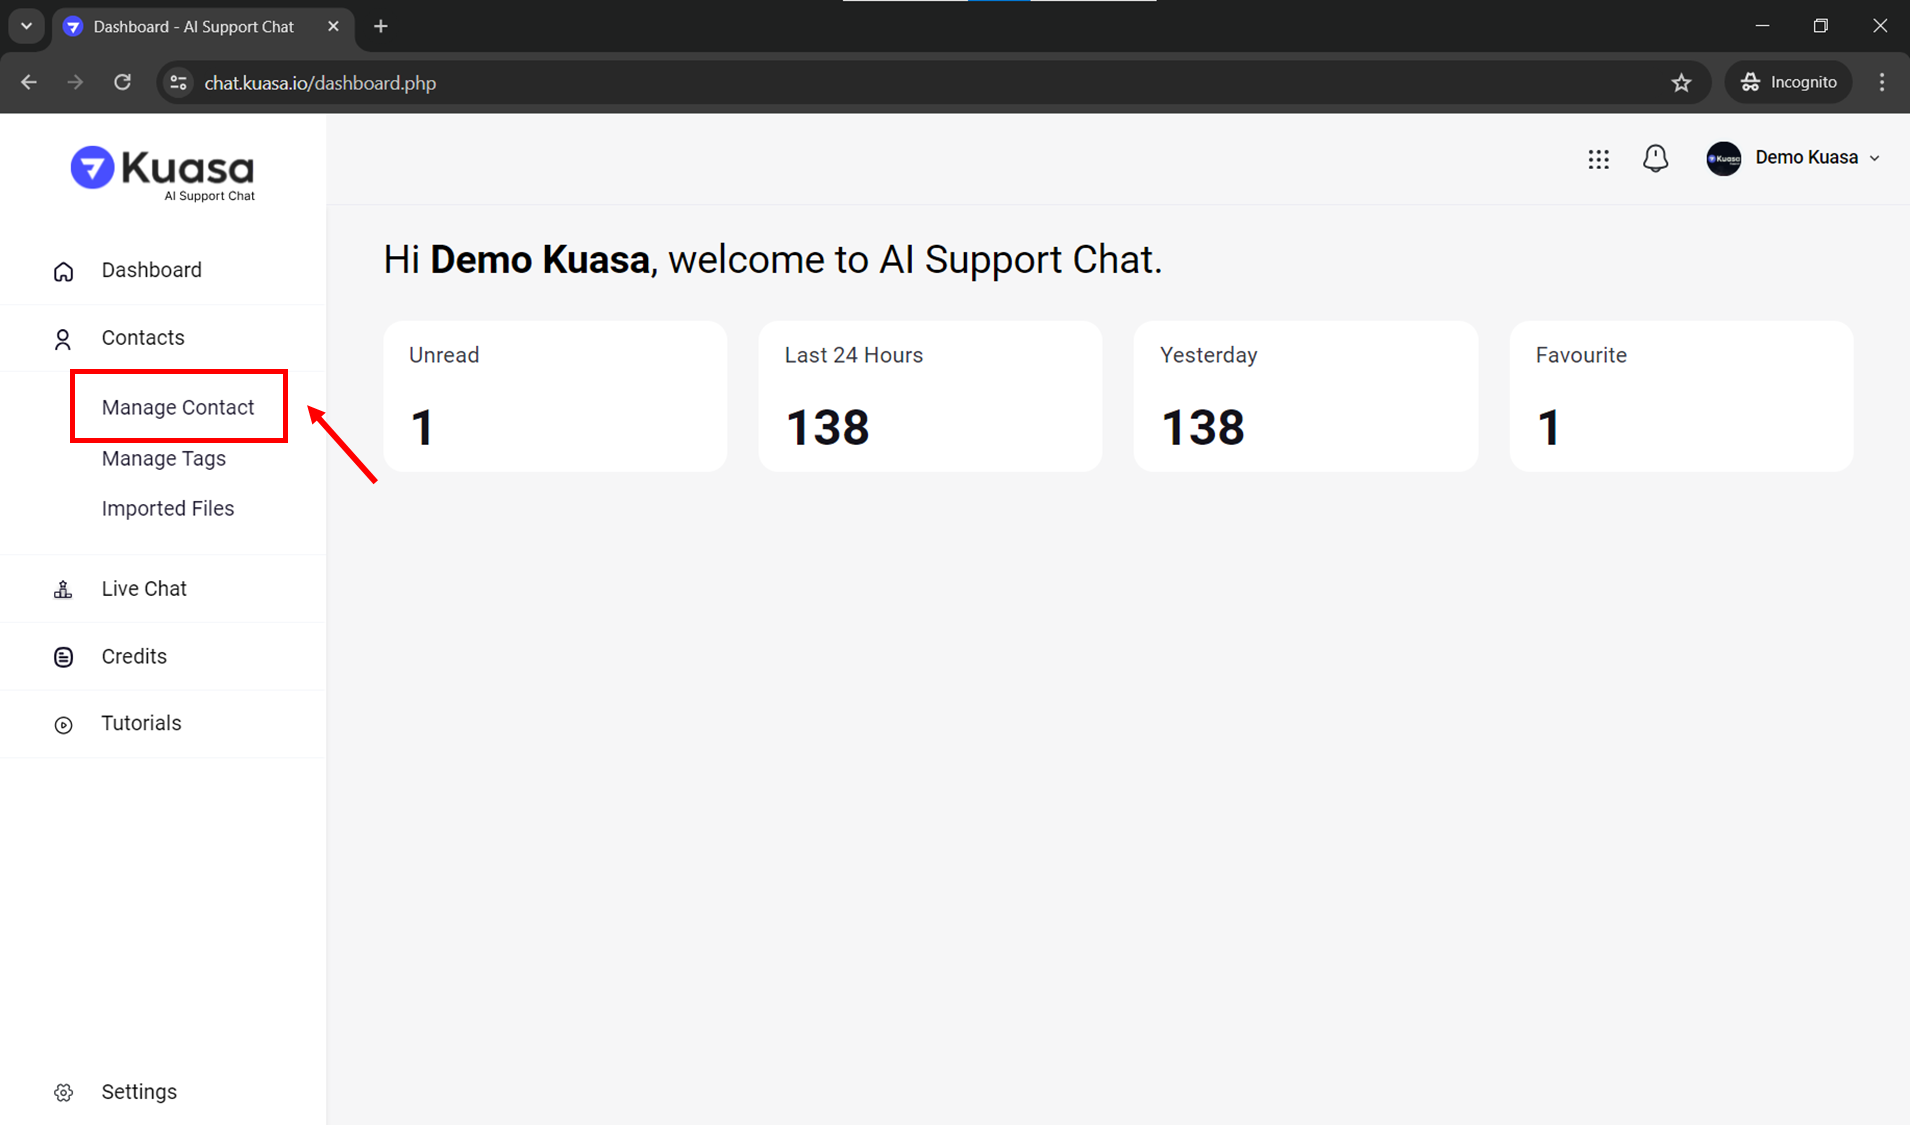
3. Click **Contacts >** **Manage Contact**.
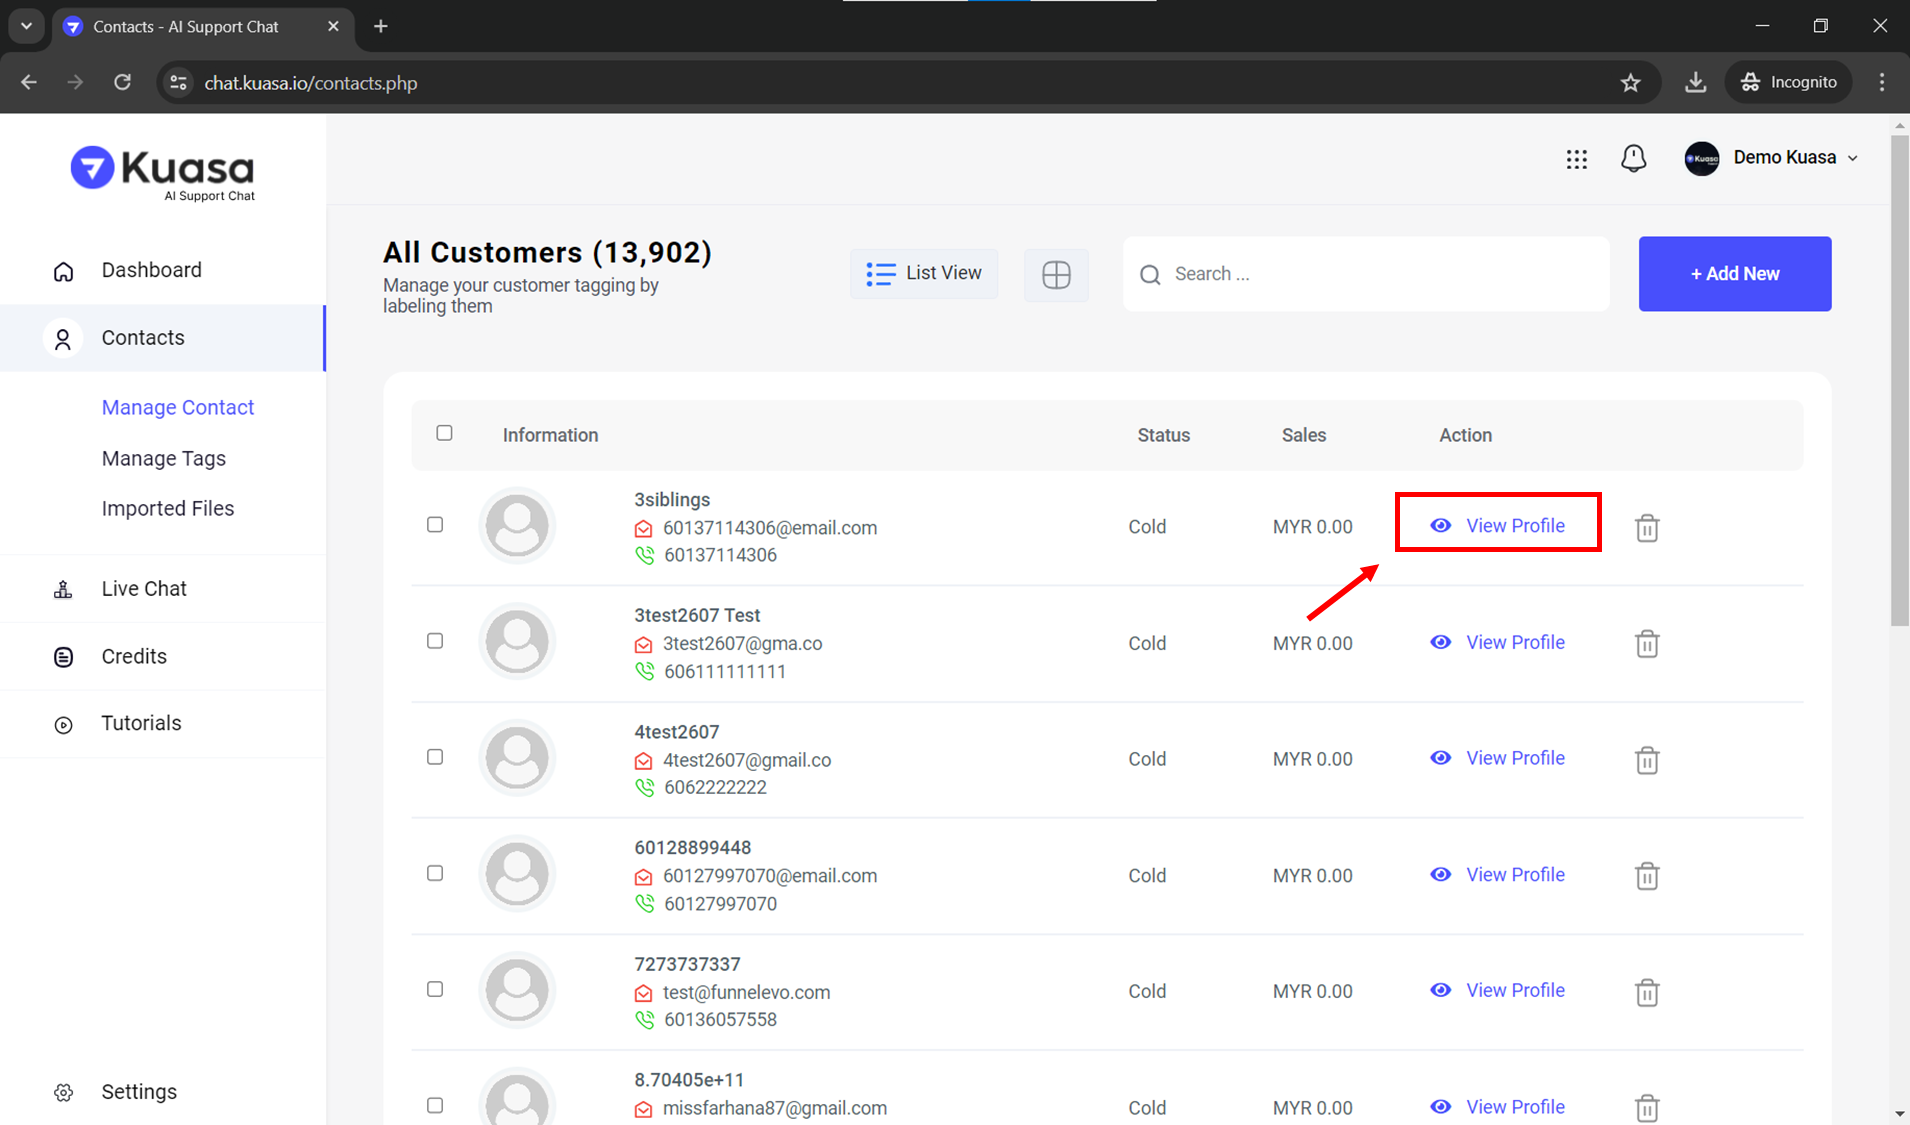
4. Click **View Profile** button.
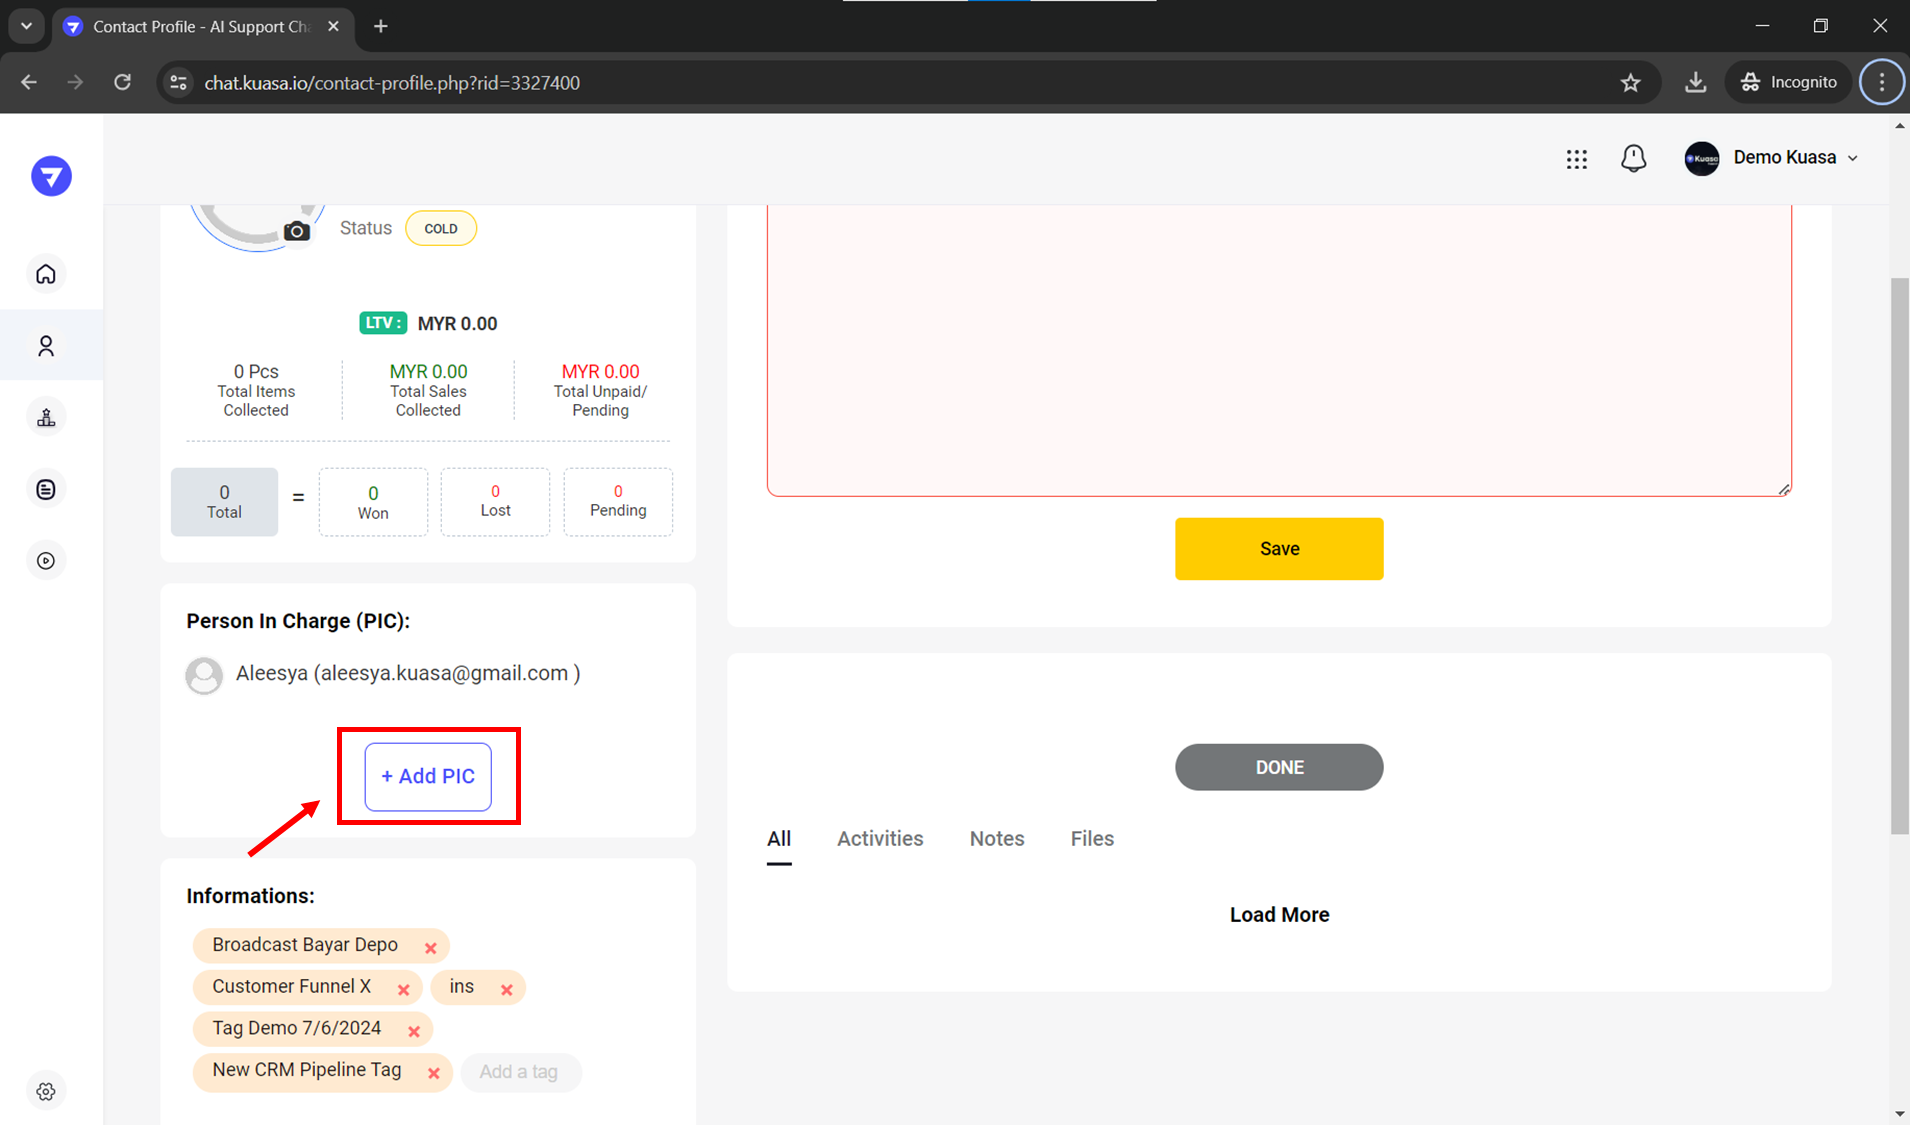
5. You may click **+ Add PIC** button as shown in the picture below.
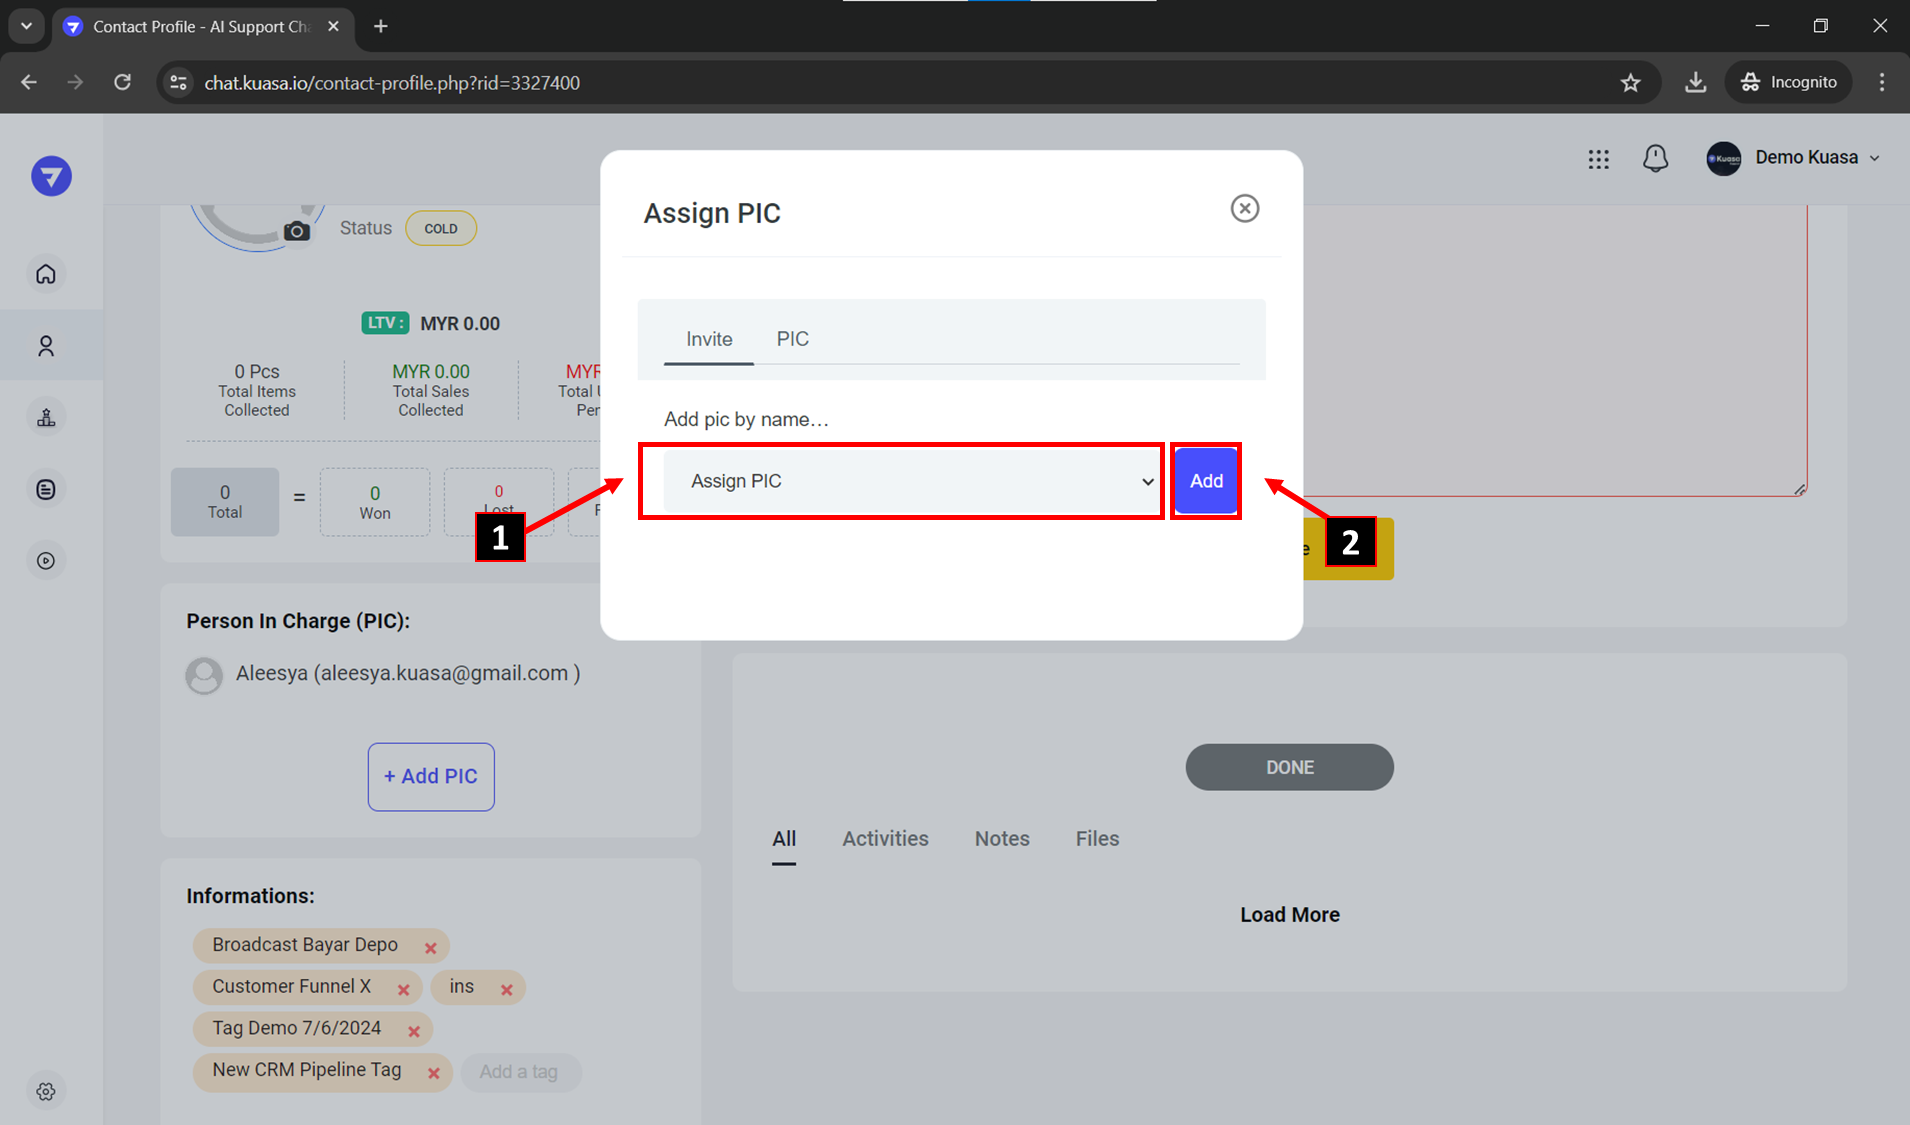
6. You may choose name from the Assign PIC list, then click **Add** button as you have confirmed your PIC.
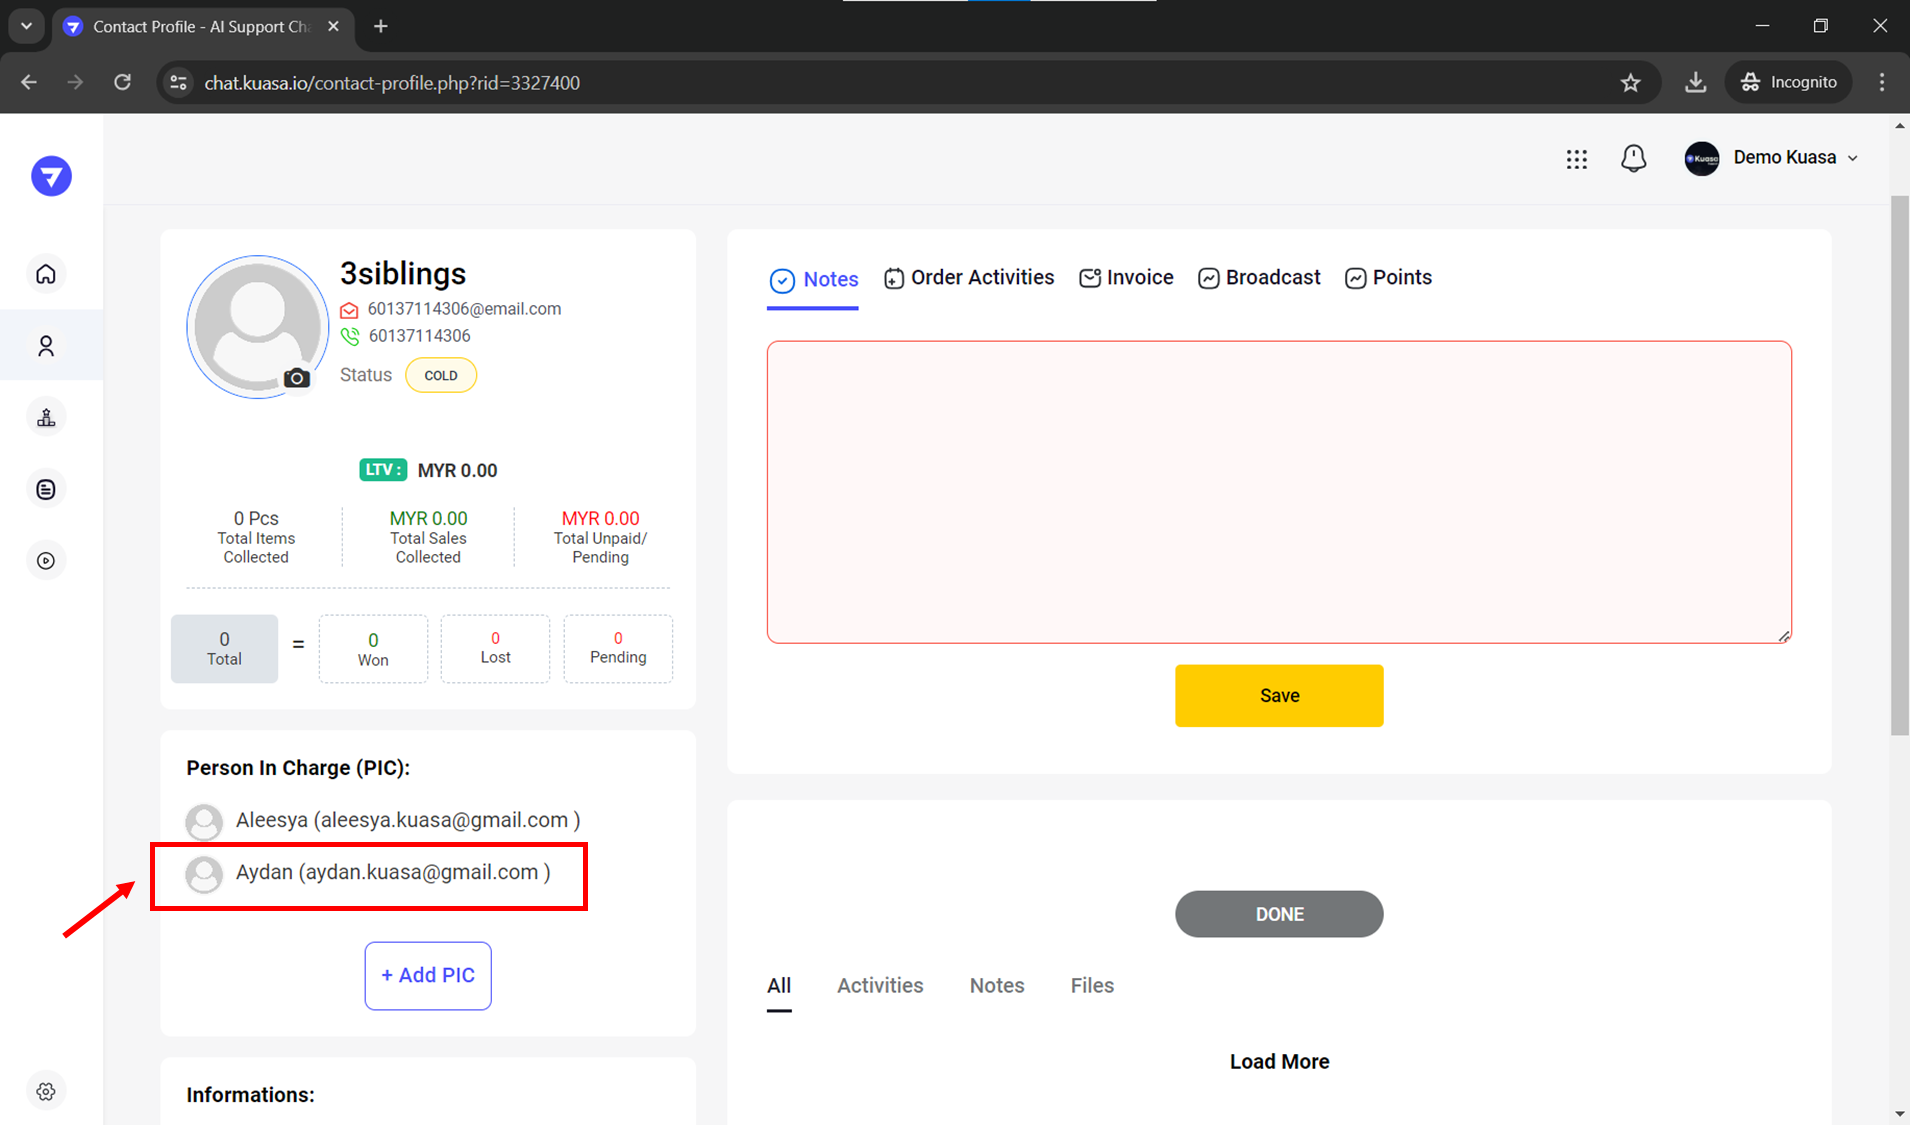
7. Assigned PIC is shown on the customer's contact profile successfully.