> For the complete documentation index, see [llms.txt](https://tutorials.kuasa.io/getting-started/llms.txt). Markdown versions of documentation pages are available by appending `.md` to page URLs; this page is available as [Markdown](https://tutorials.kuasa.io/getting-started/kuasa-crm-pipeline/contacts/manage-tags/how-to-add-tags-to-a-bulk-of-contacts.md).
# How To Add Tags To A Bulk Of Contacts
1. Login to your account via .
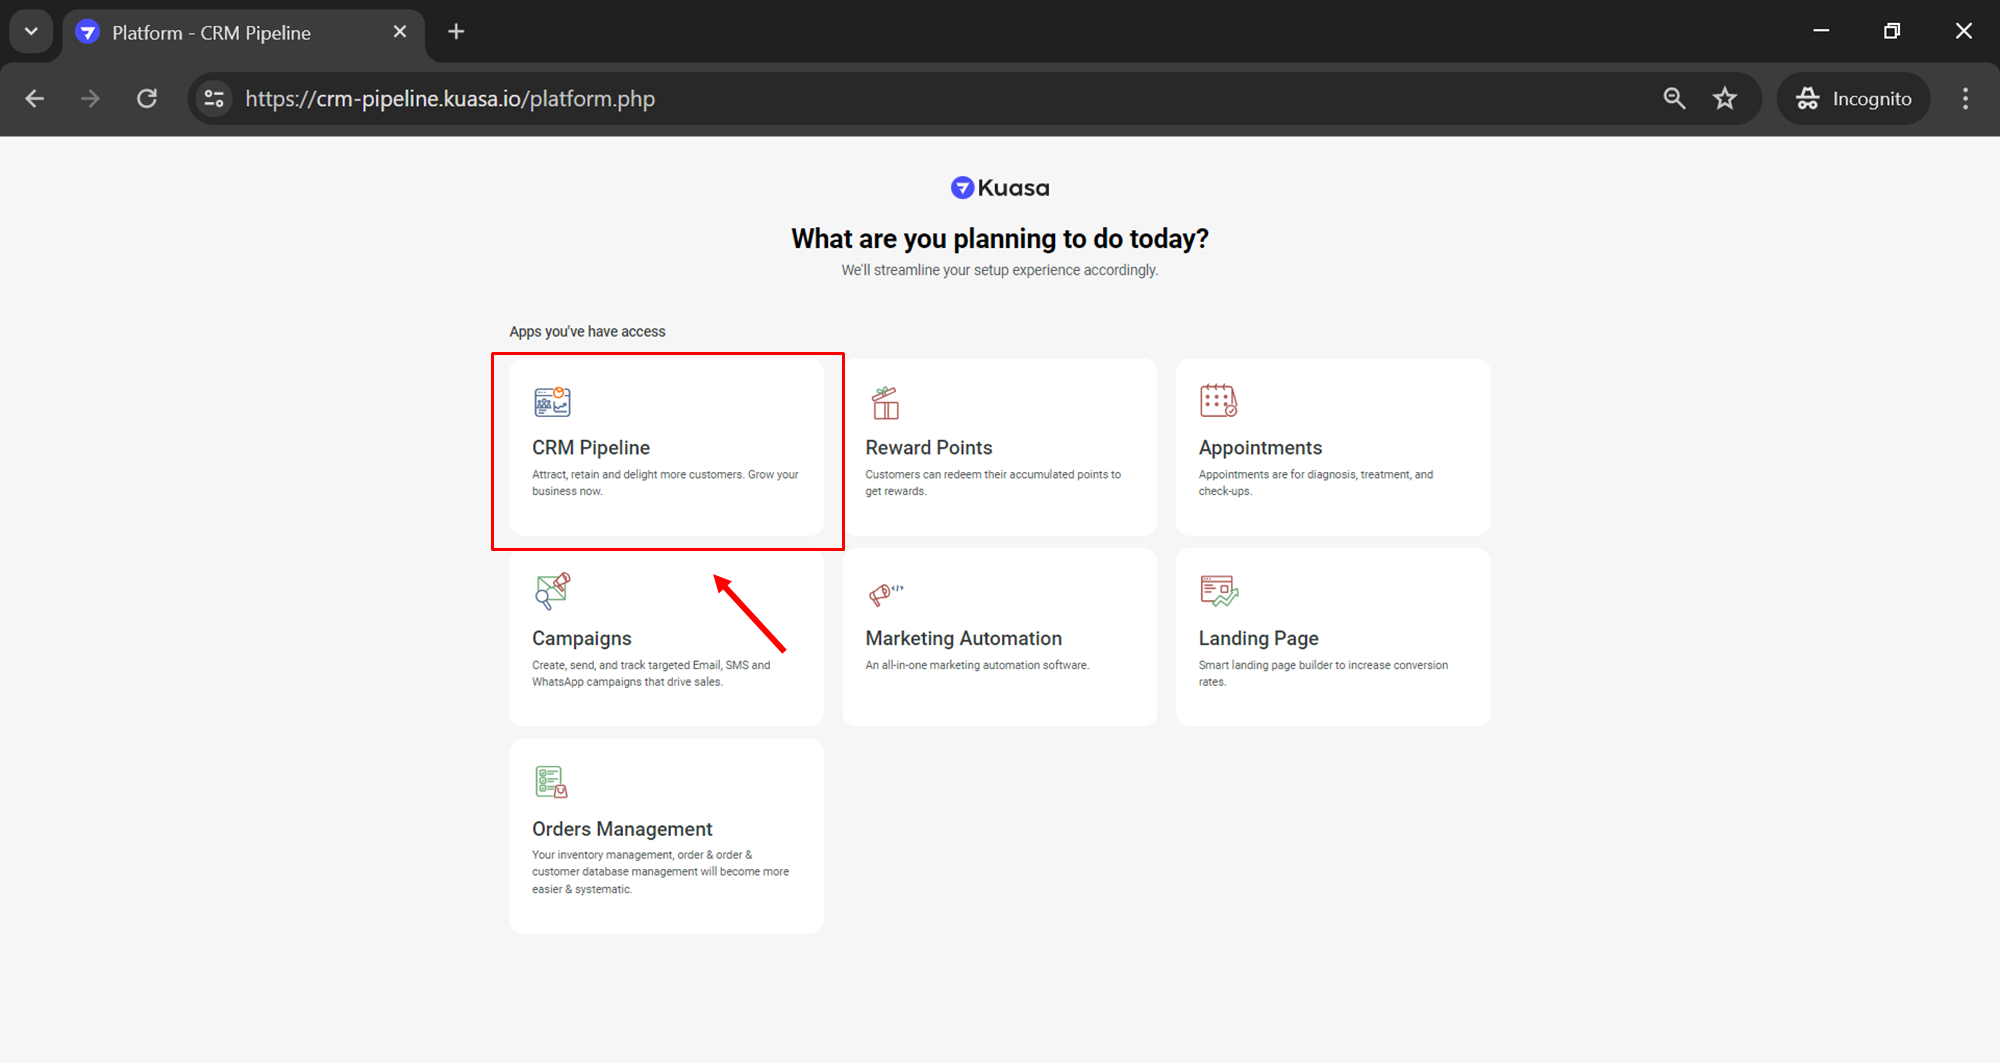
2. Click **CRM Pipeline.**
3. Click **Contacts > Manage Tags**.
4. Click any tagging that you want to add bulk of contacts.
5. Click **+ Add New** button on the right top.
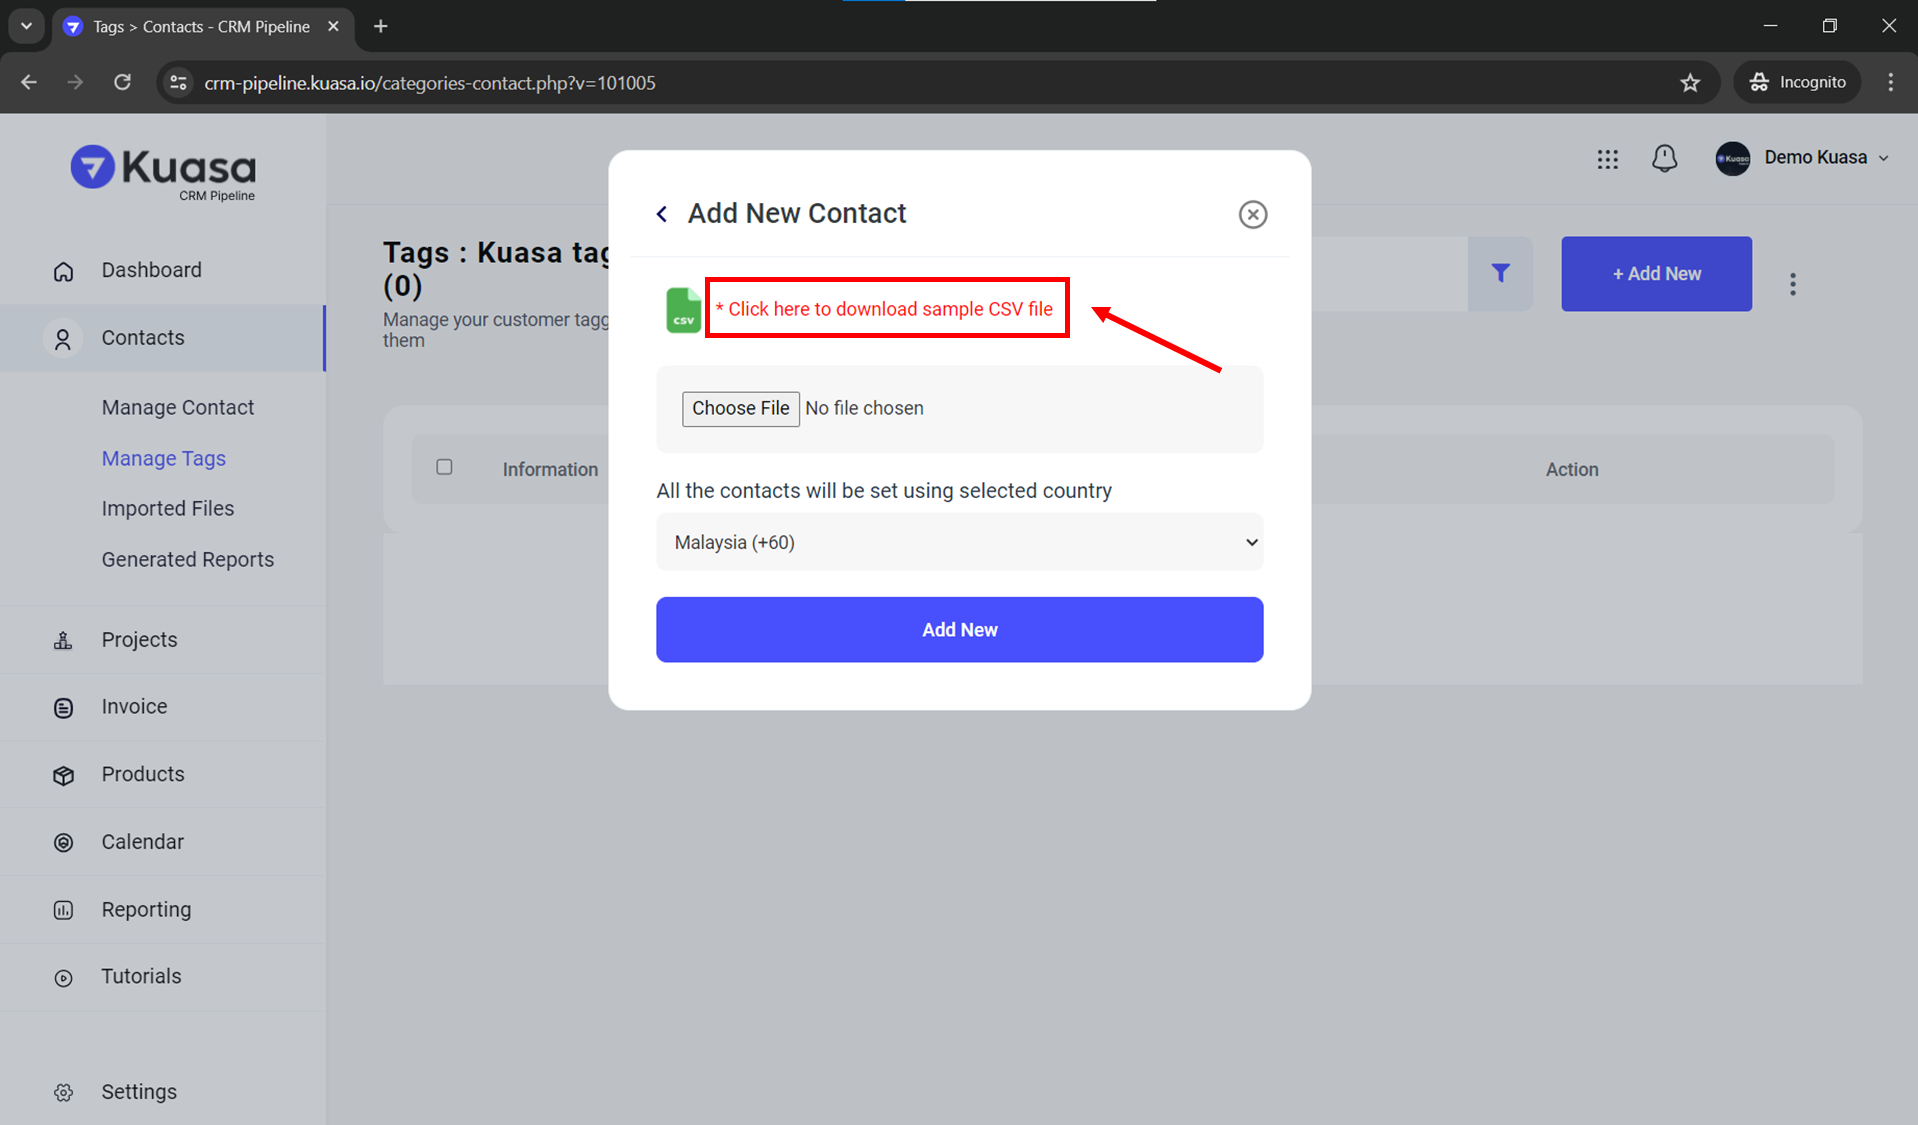
6. Click **Import with CSV** button.
7. Click the red link to download CSV file template.
8. Enter your customers' databases in the CSV file.
**MAKE SURE TO CHANGE PHONE NUMBER FORMAT FROM GENERAL TO NUMBER**
1. Highlight column C together with the header C.
2. Click on the General as shown in the picture above and select Number to change the format.
3. Click twice on the section as shown in the picture above.
4. After you have successfuly changed the format, the right format of phone number as shown in the picture above.
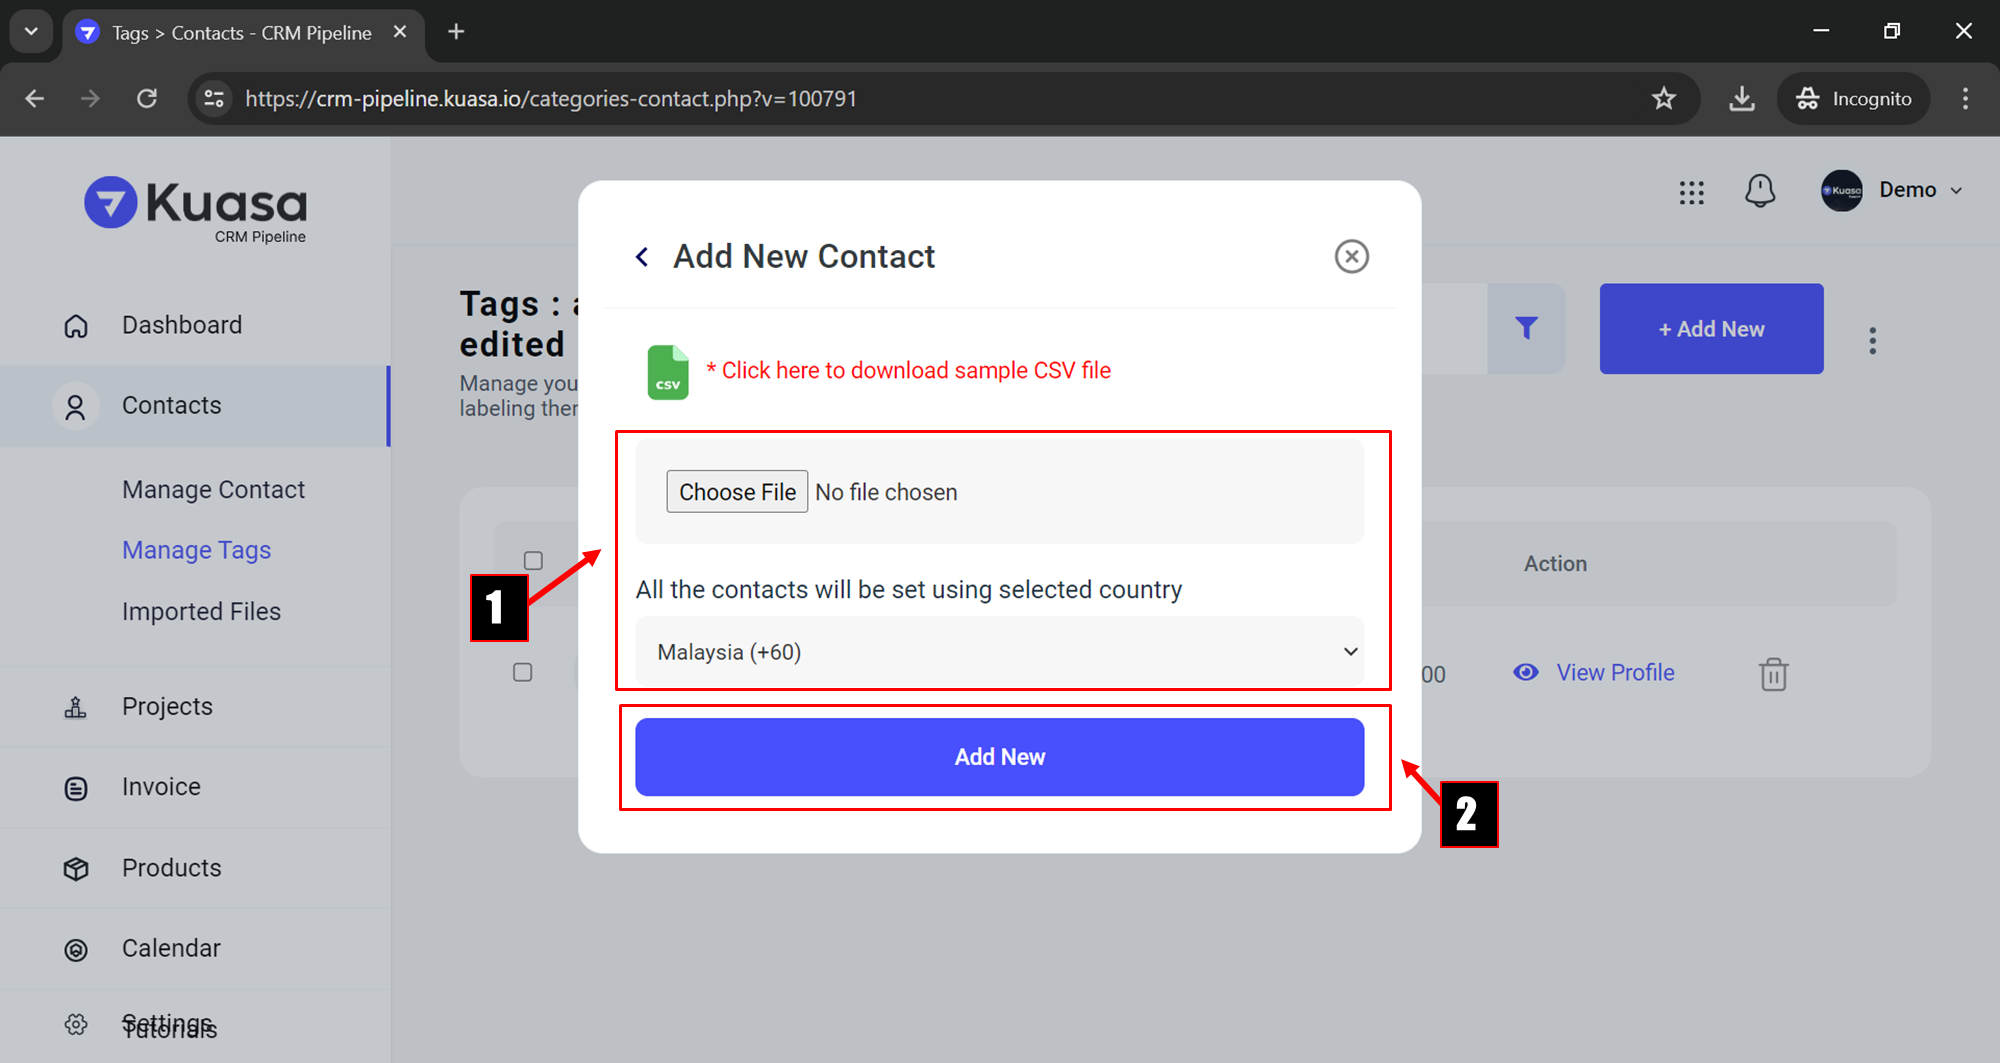
5. Step 1: Upload your CSV file that contains all the contacts by clicking the **Choose File** button.\
\
Step 2: Click **Add New** button to proceed with the process.
10. Uploaded file will shown its status as pending after successfully uploaded as shown in the picture below.
11. As the contacts are successfully uploaded, they are listed as shown in the pictures below.