> For the complete documentation index, see [llms.txt](https://tutorials.kuasa.io/getting-started/llms.txt). Markdown versions of documentation pages are available by appending `.md` to page URLs; this page is available as [Markdown](https://tutorials.kuasa.io/getting-started/kuasa-crm-pipeline/settings/how-to-setup-add-team-members.md).
# How To Setup/Add Team Members
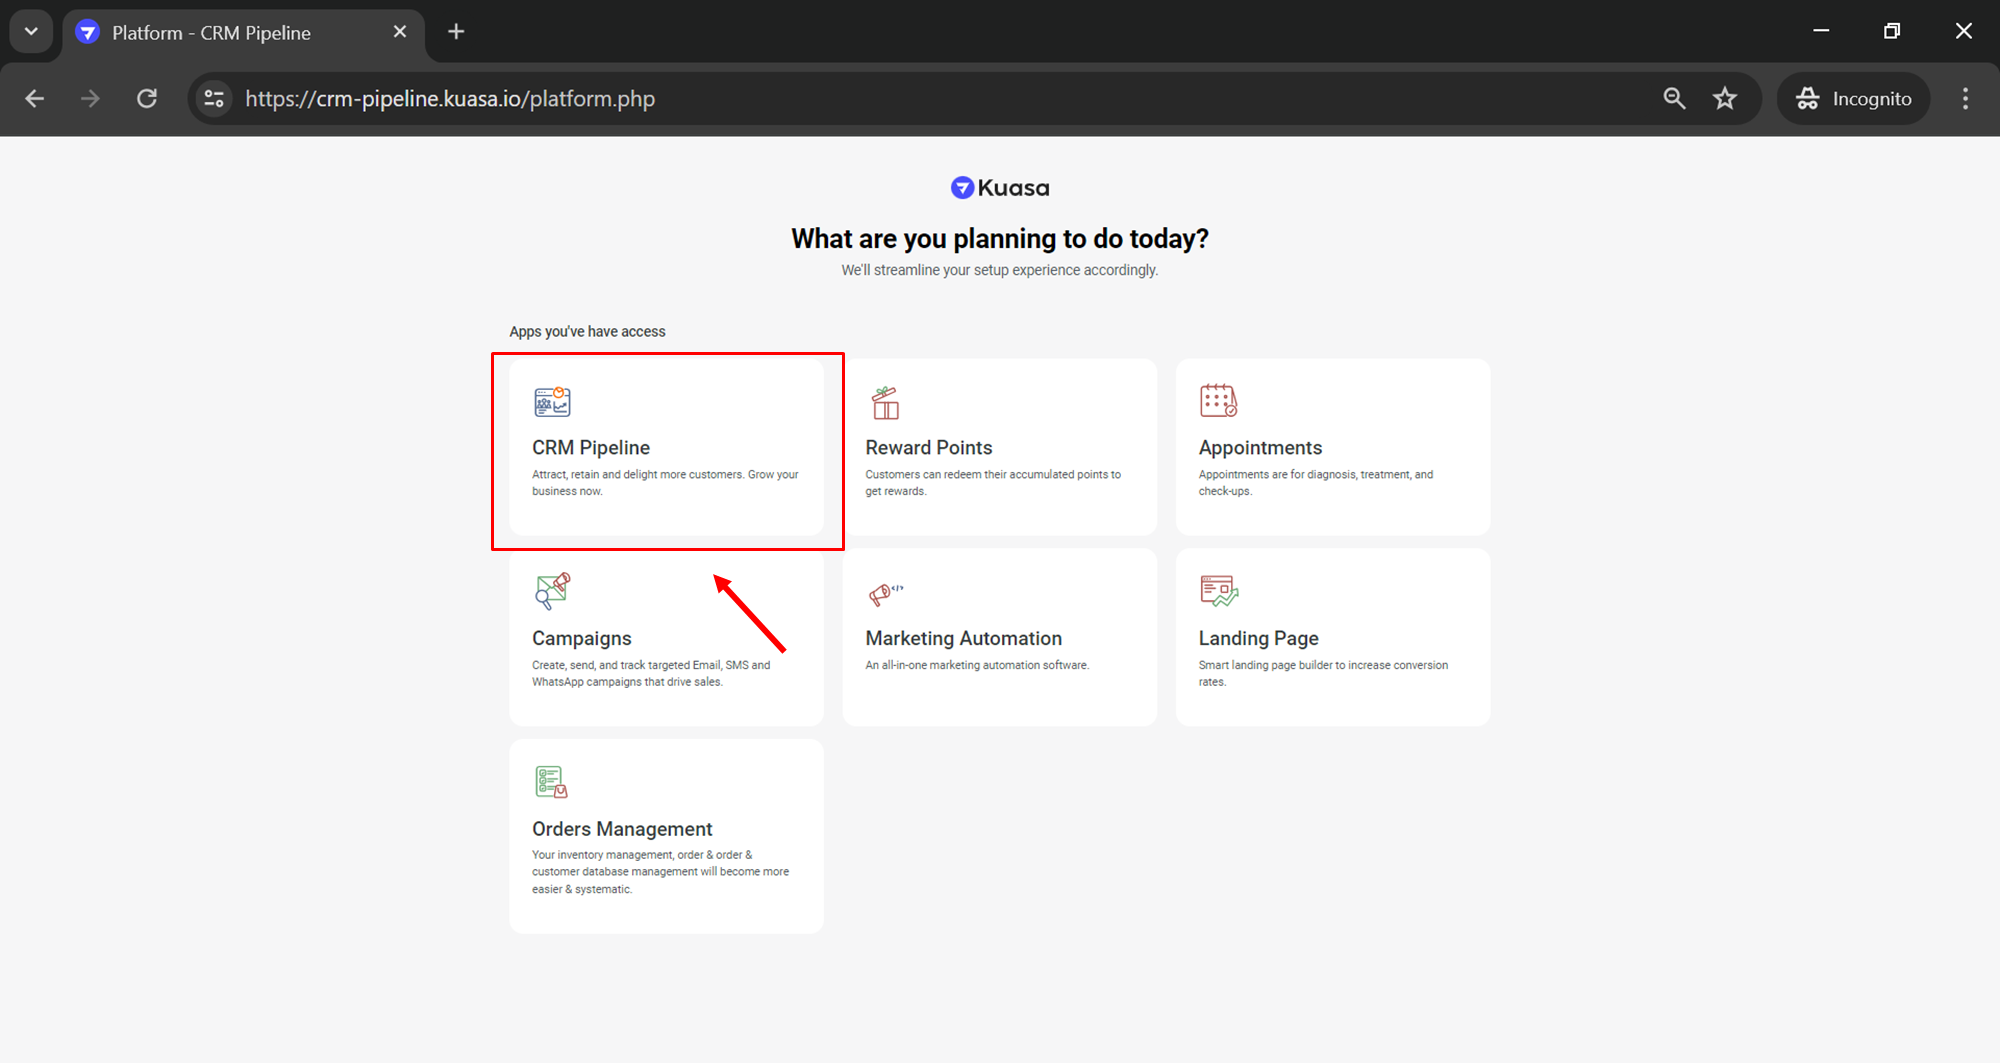
1. Login to your account via [**https://crm-pipeline.kuasa.io/**](https://crm-pipeline.kuasa.io/)**.**
2. Click **CRM Pipeline.**
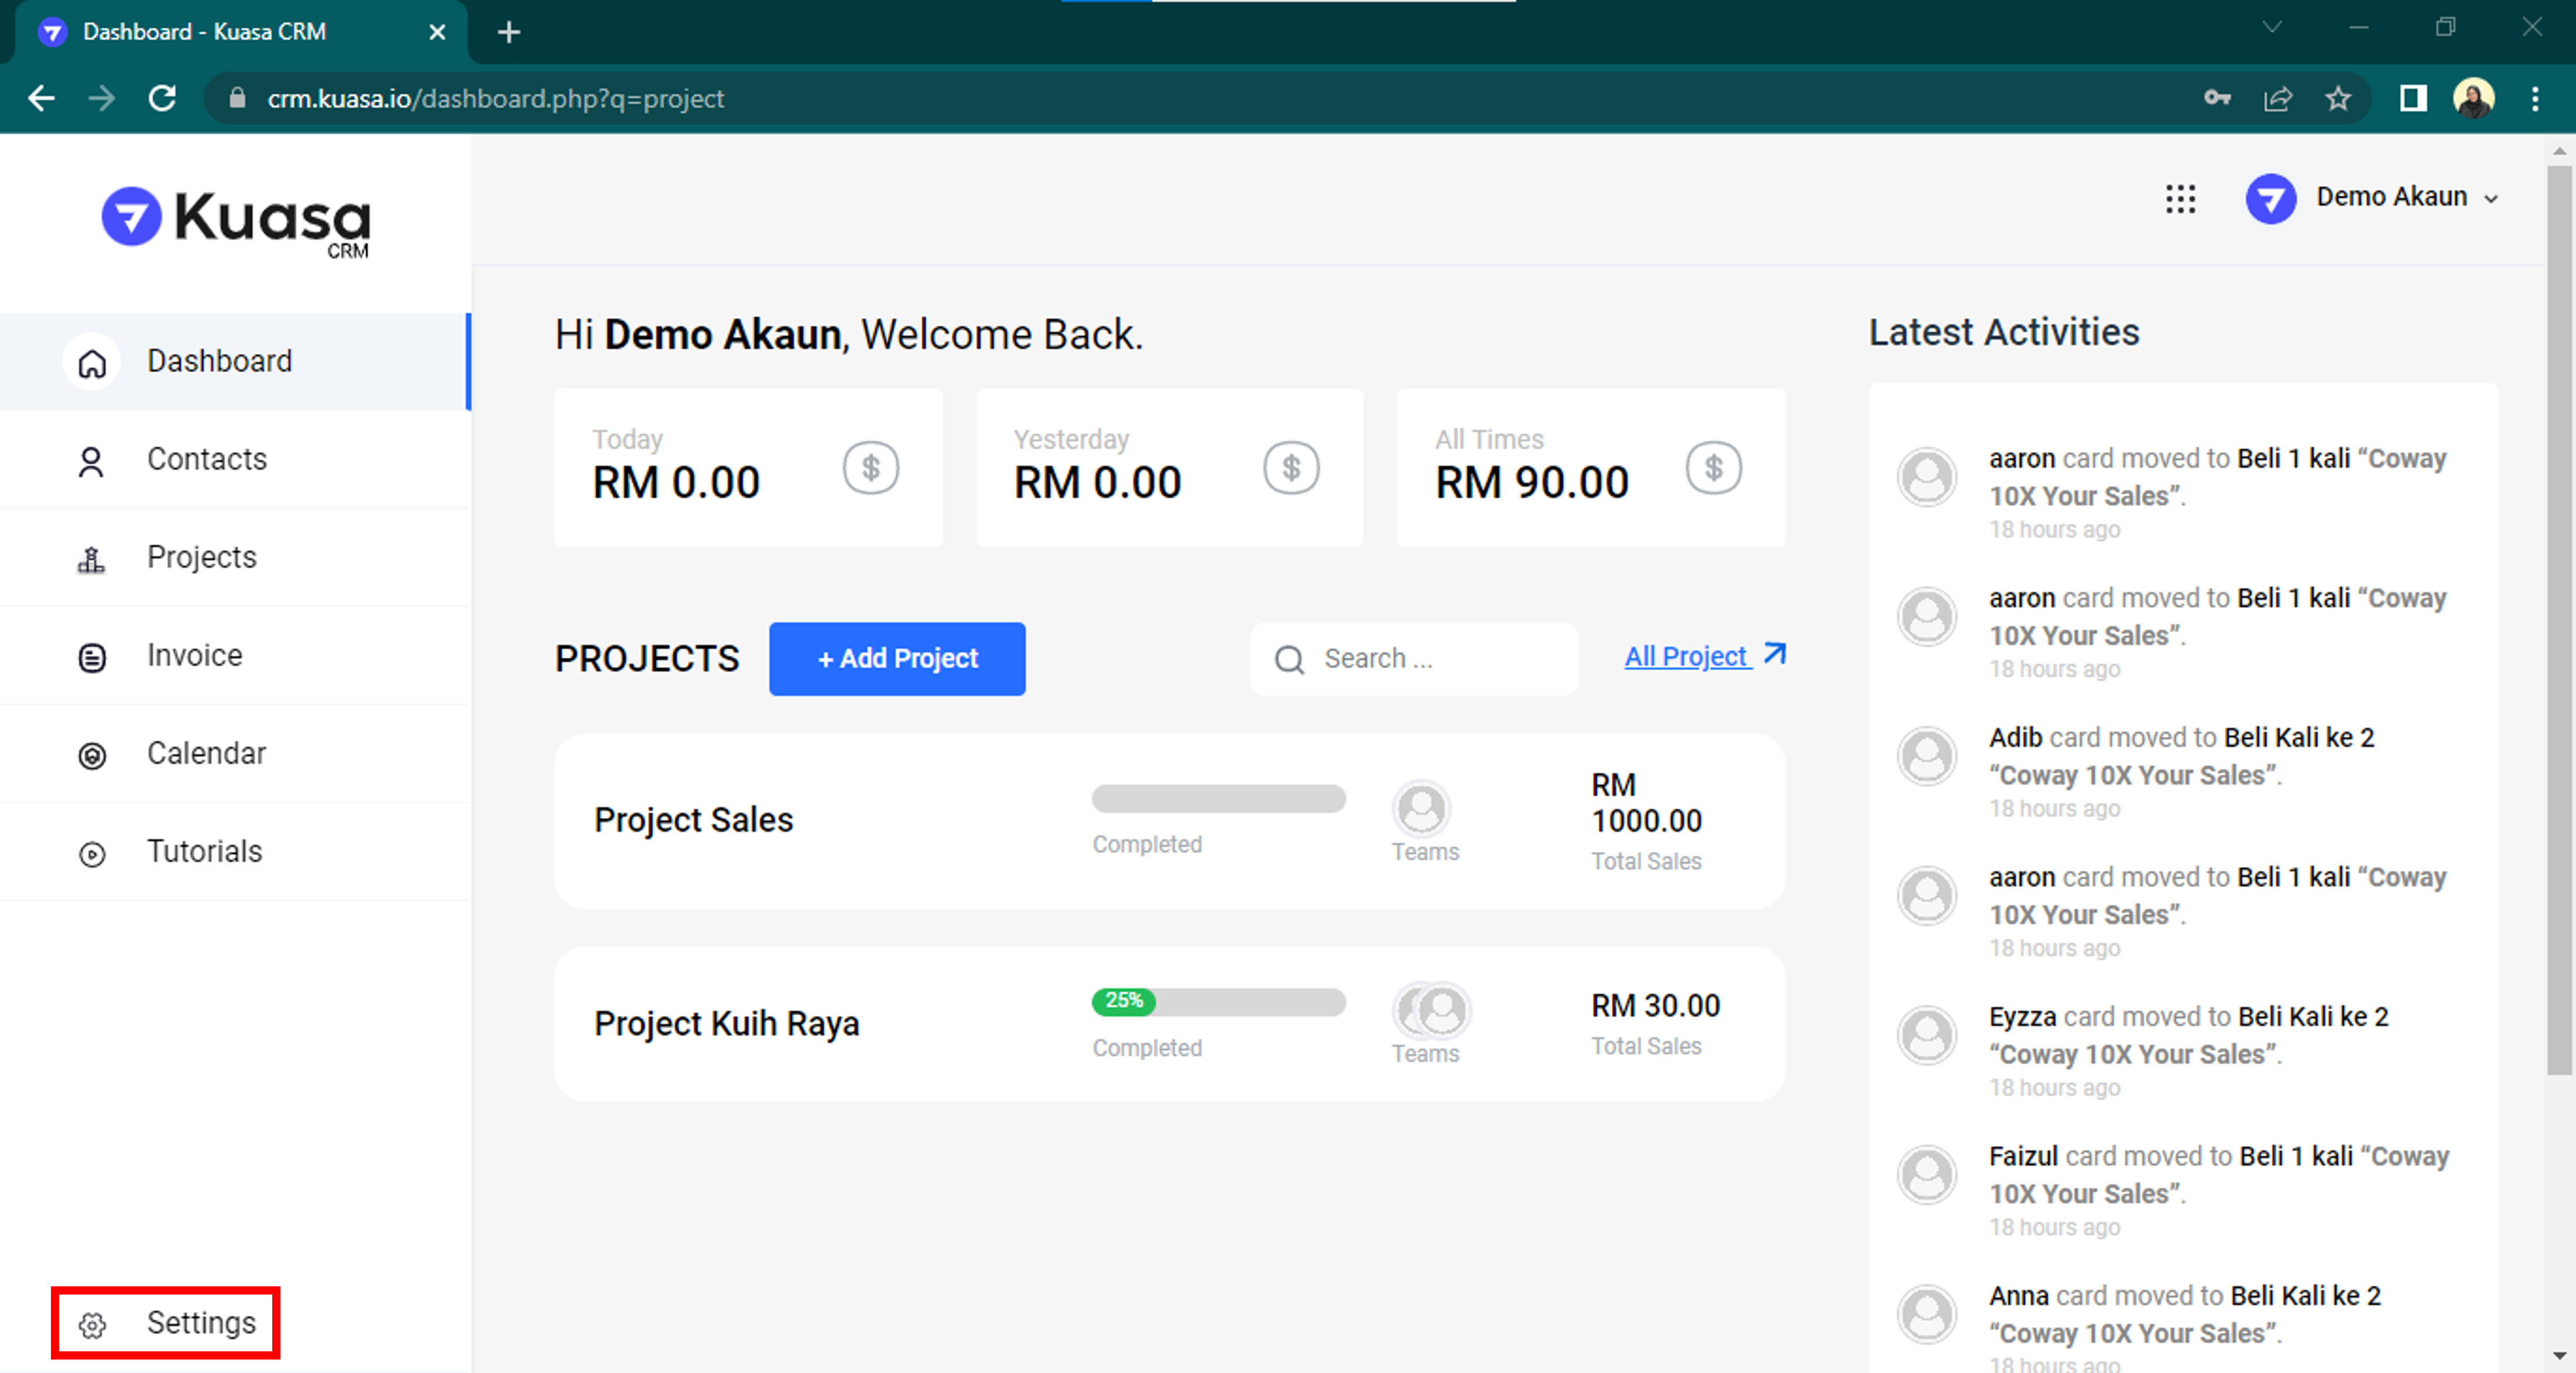
3. Click on **Settings**.
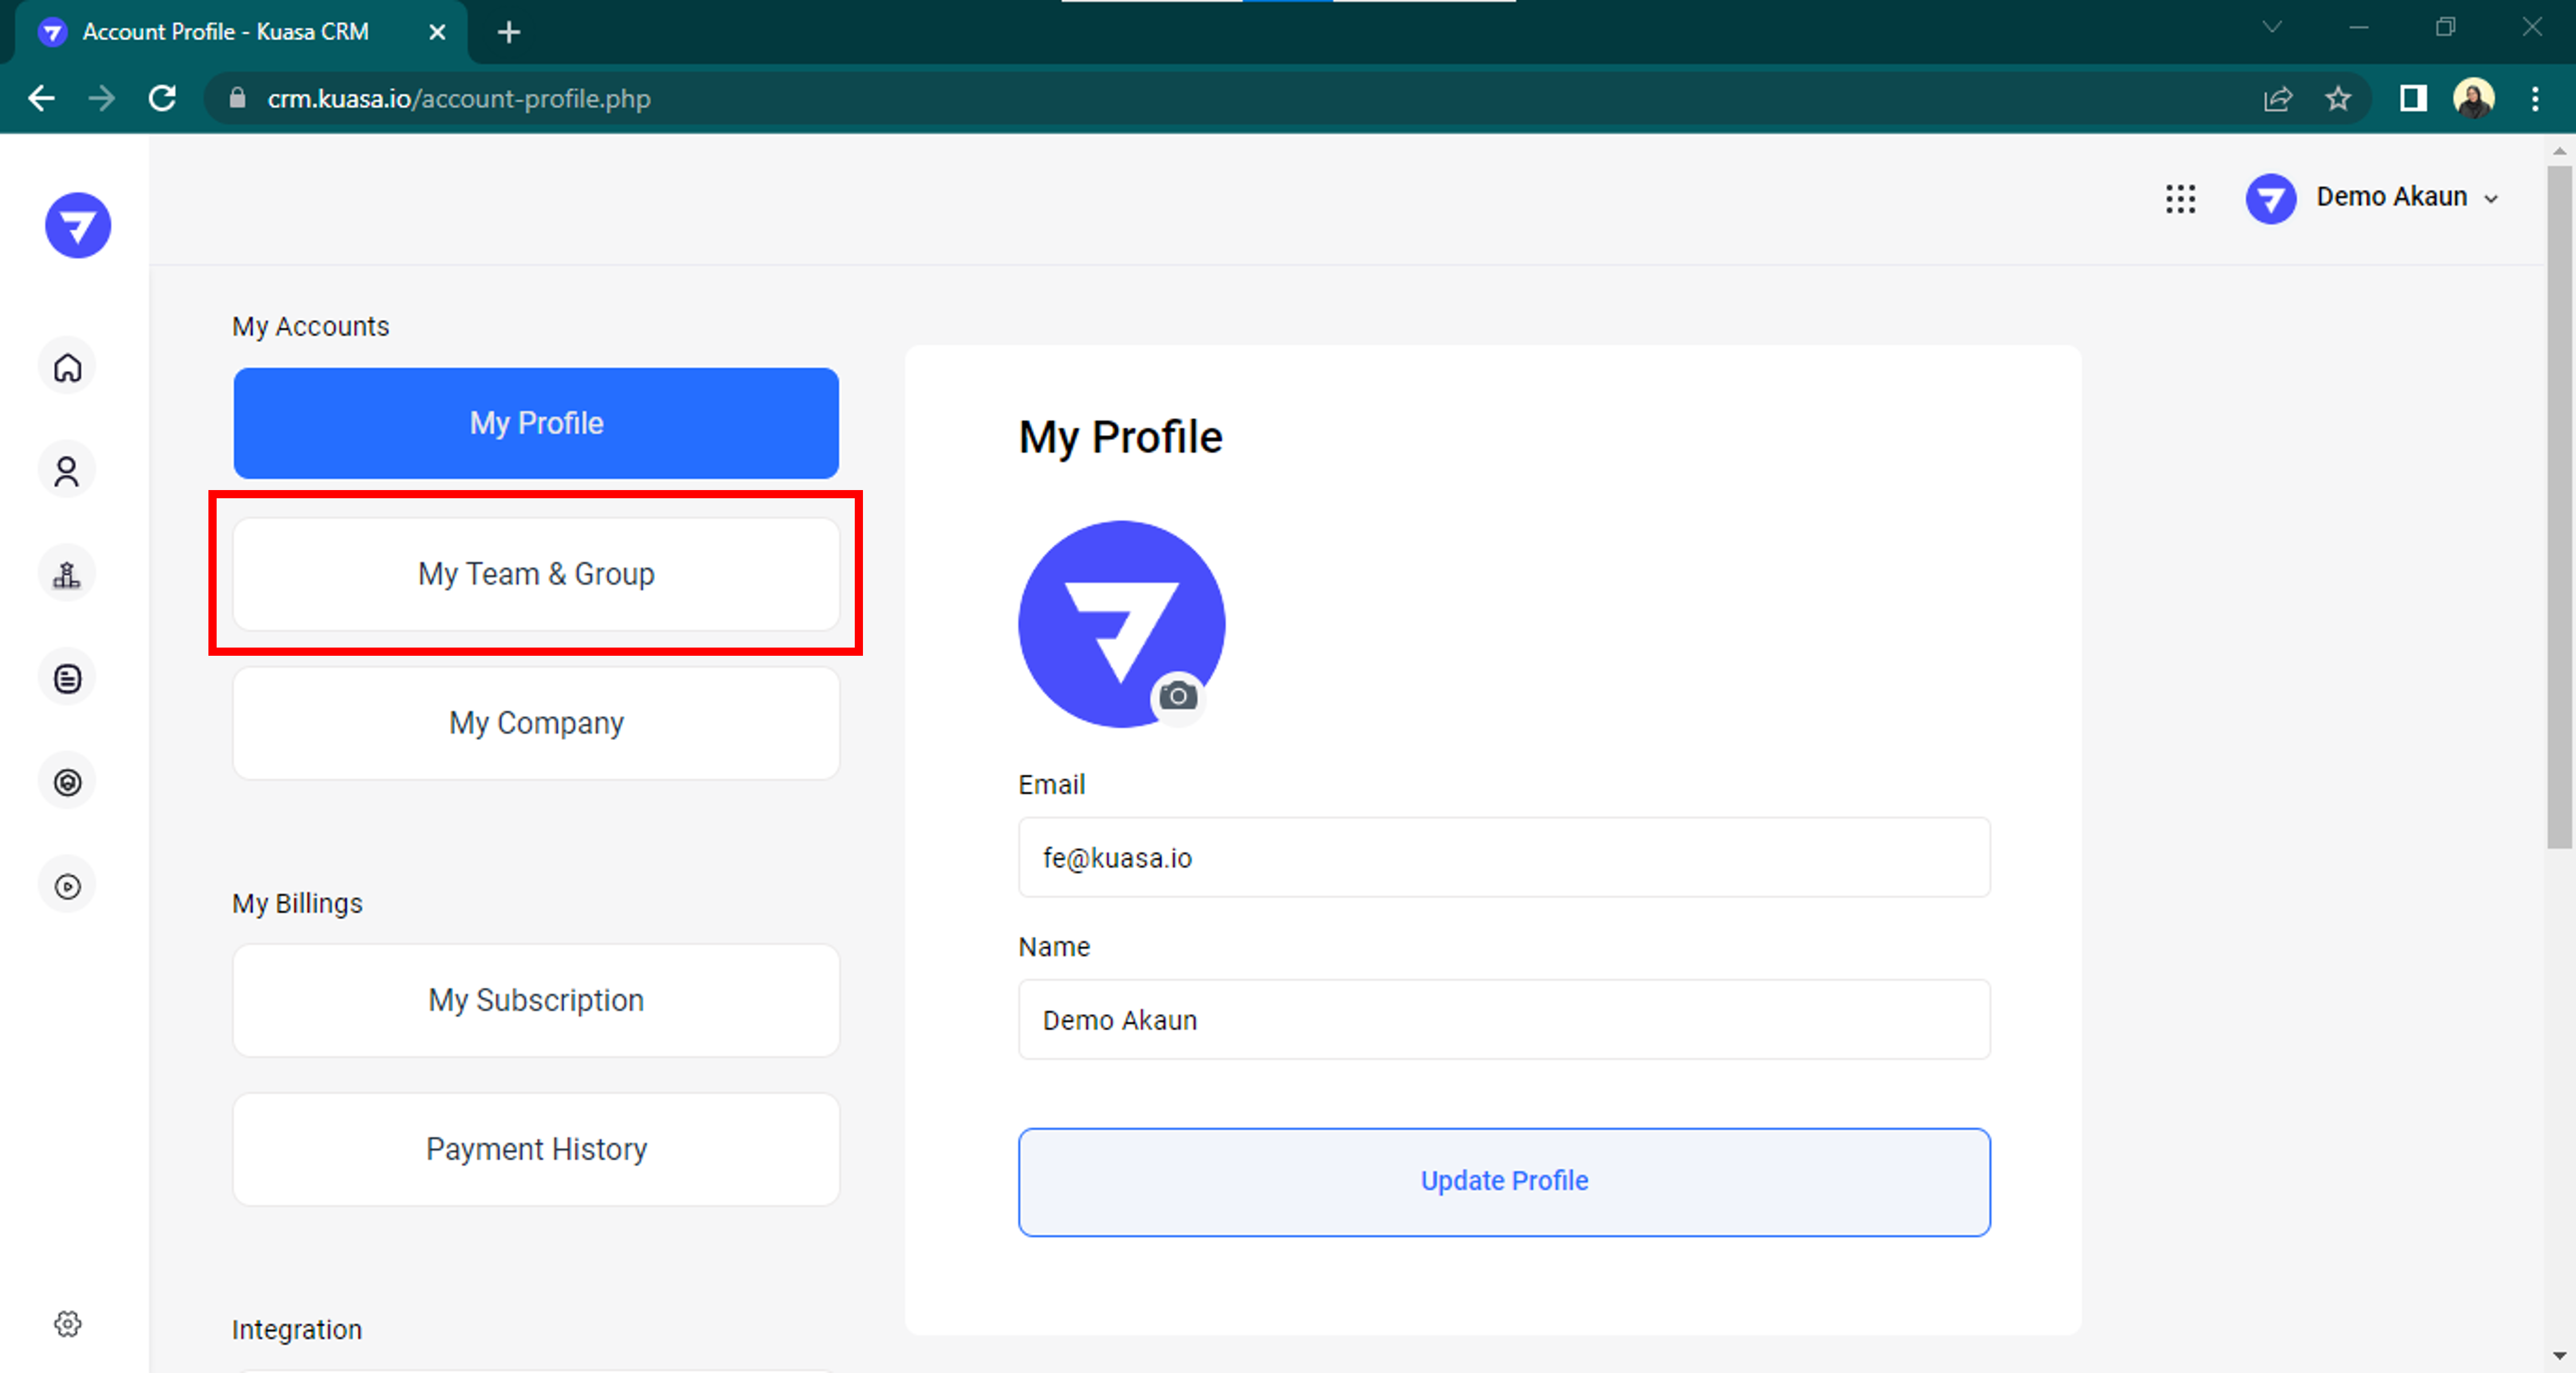
5. Click **My Team & Group**.
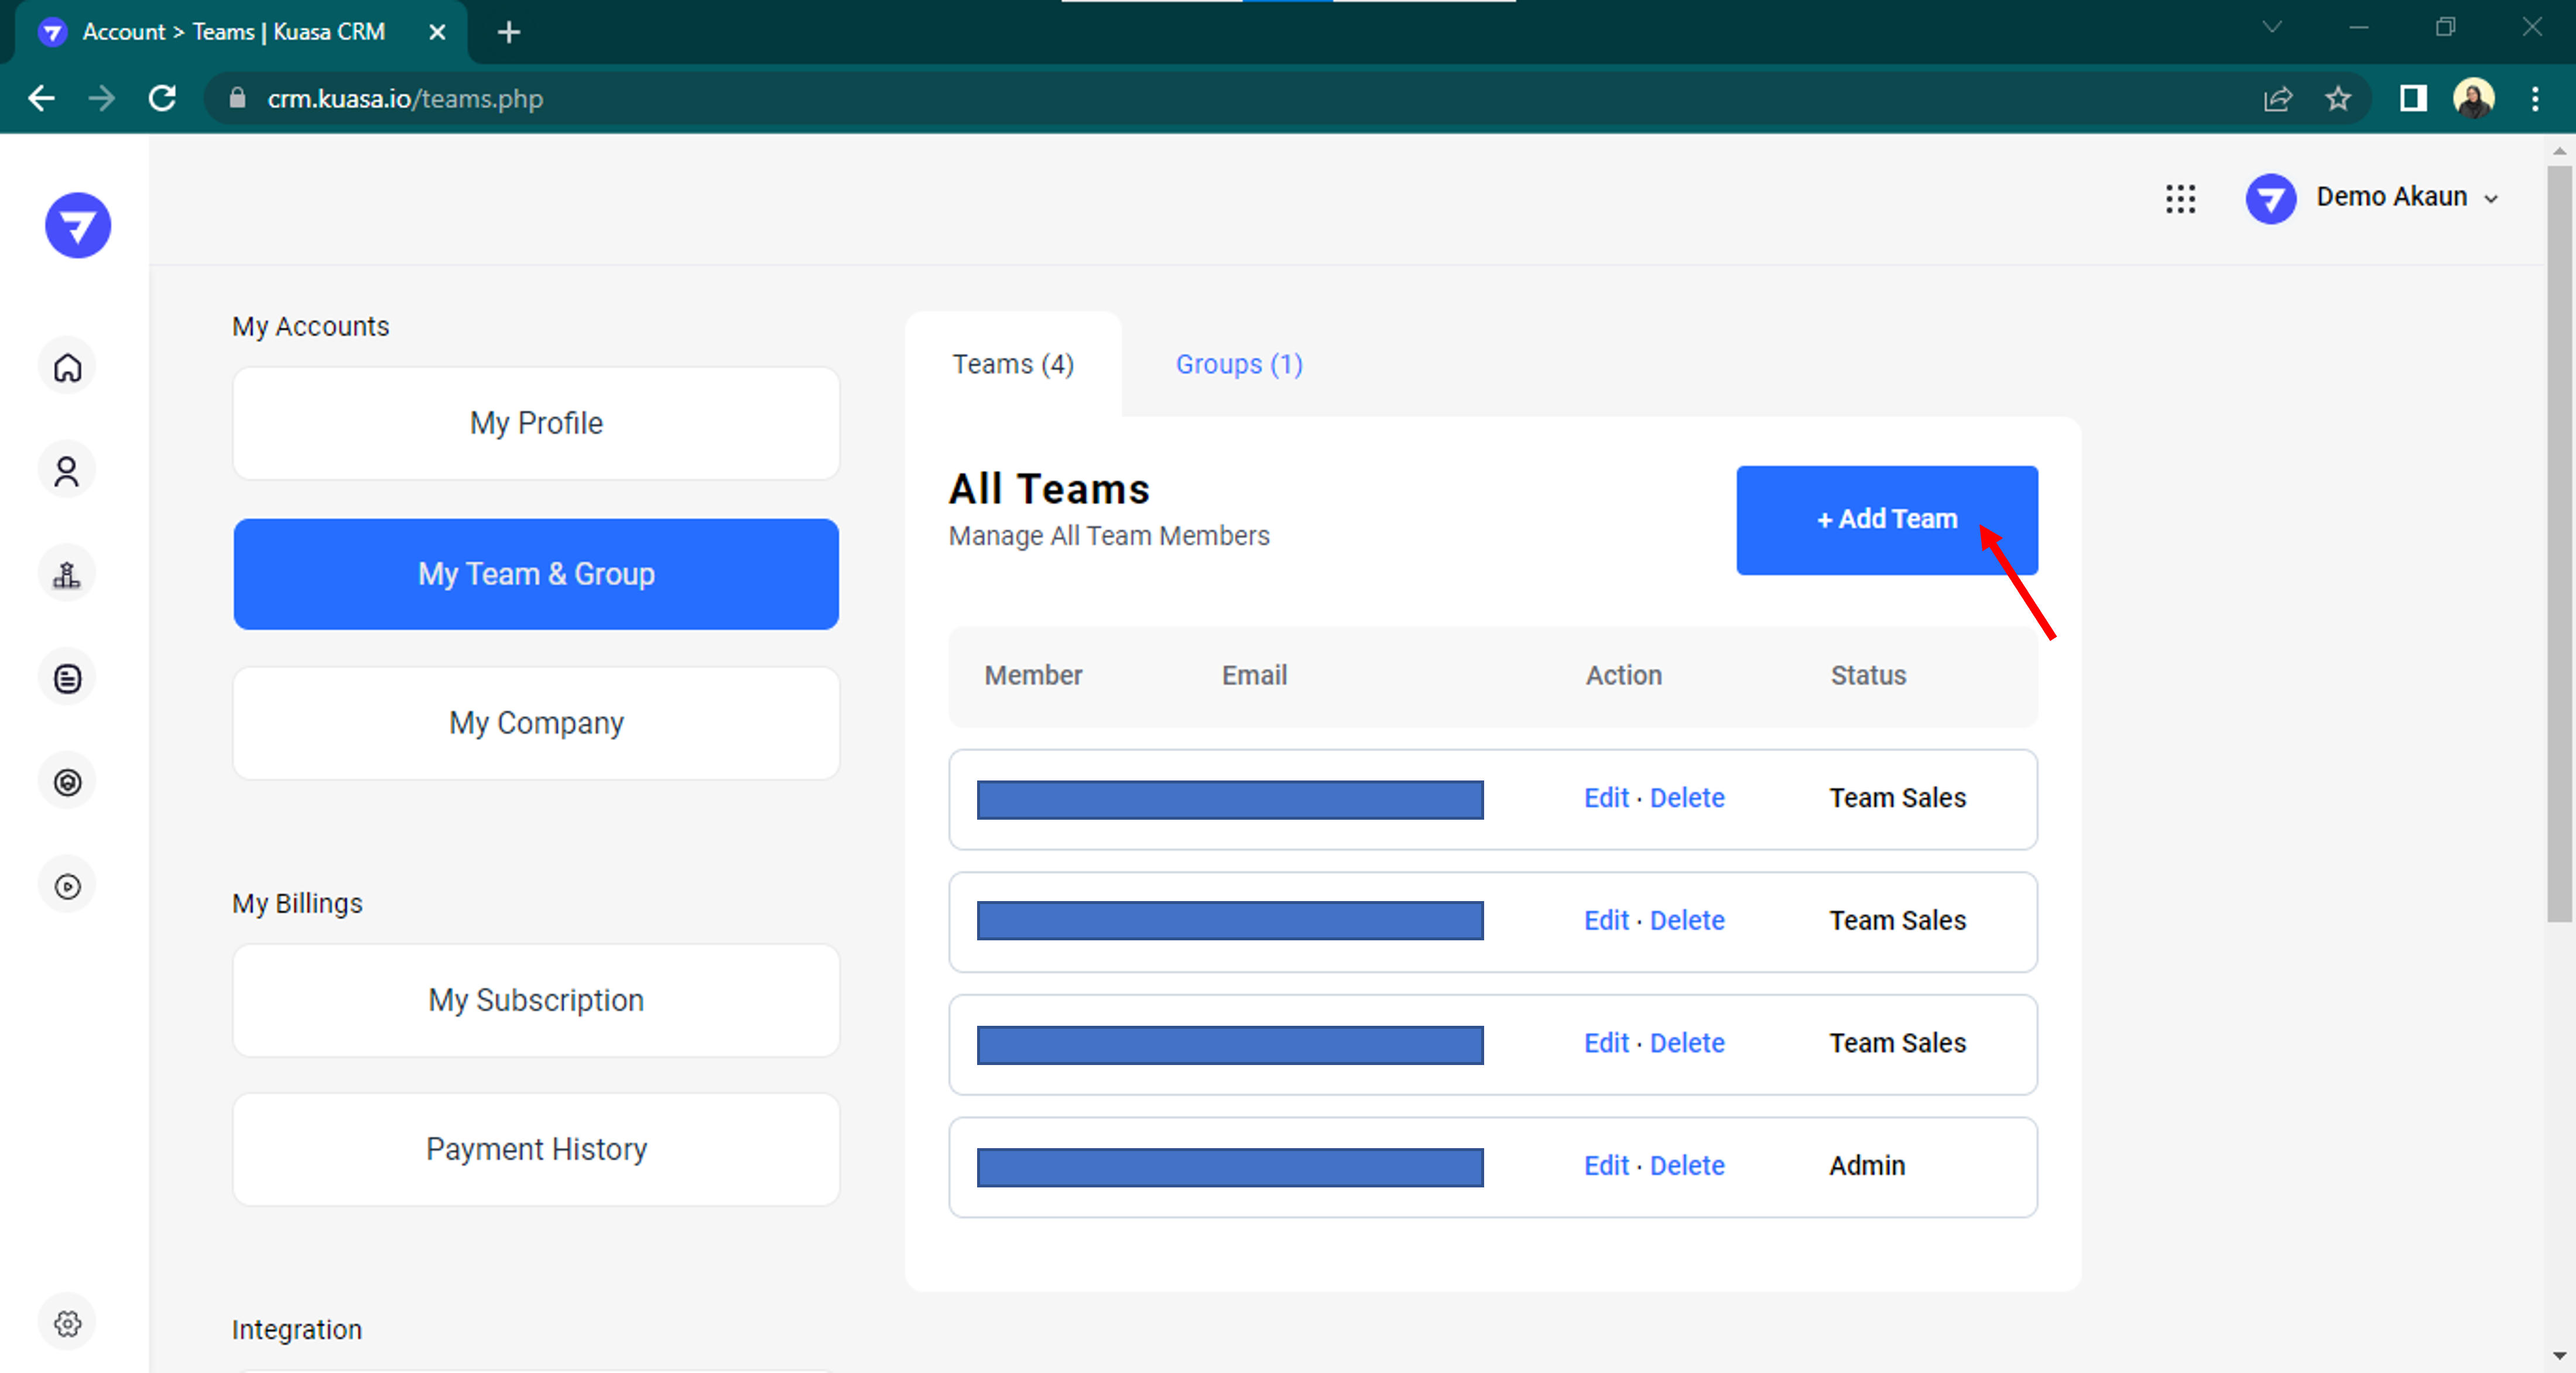
6. Click **Add Team**.
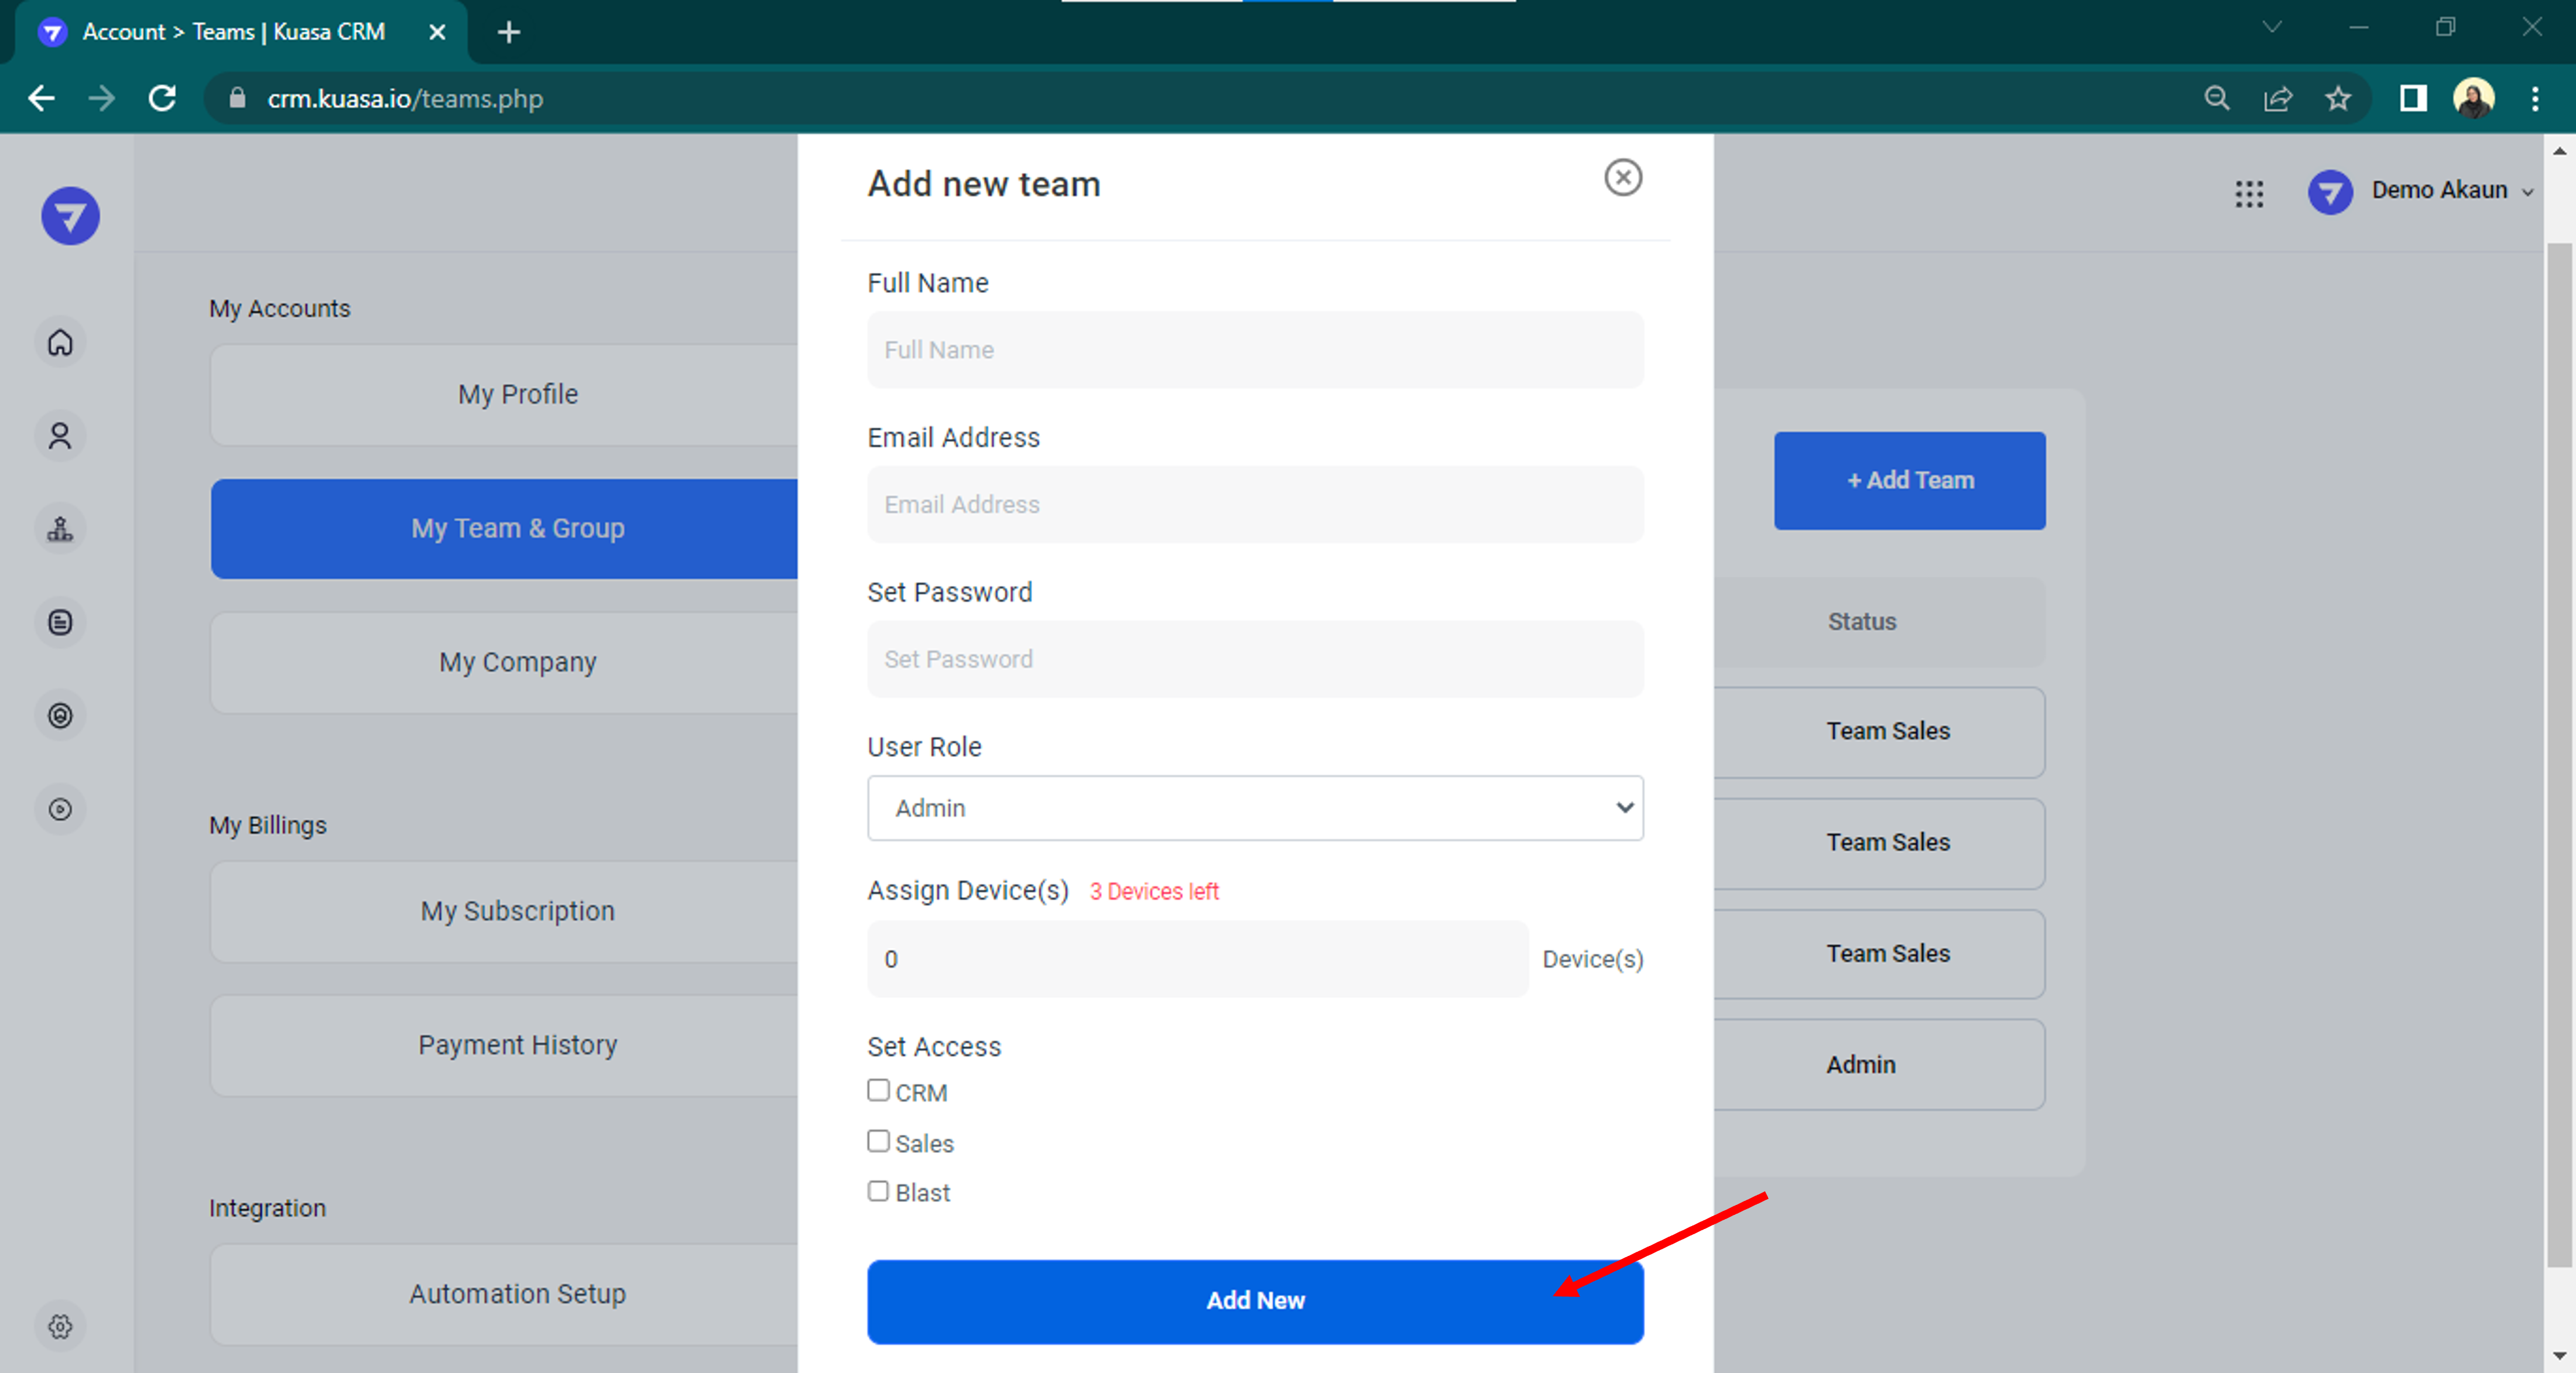
7. After entering the required information, click **Add New** to save it all.
{% hint style="info" %}
Full Name -> Team member's full name
Email Address -> Team member's email
Set Password -> Enter the password for the team member's account
User Role -> Select team member position (Admin/Team Sales/etc.)
Assign Device -> Number of devices to be given to team members for Blasting use
Set Access -> Choose which Authority to give access to team members
{% endhint %}
8. Congratulations! Your team member has been added successfully!