> For the complete documentation index, see [llms.txt](https://tutorials.kuasa.io/getting-started/llms.txt). Markdown versions of documentation pages are available by appending `.md` to page URLs; this page is available as [Markdown](https://tutorials.kuasa.io/getting-started/kuasa-appointment/products/product-listing/how-to-add-a-product-and-variants.md).
# How To Add A Product and Variants
1. Login to your account via [**https://appointment.kuasa.io/**](https://appointment.kuasa.io/)**.**
2. Click **Appointments.**
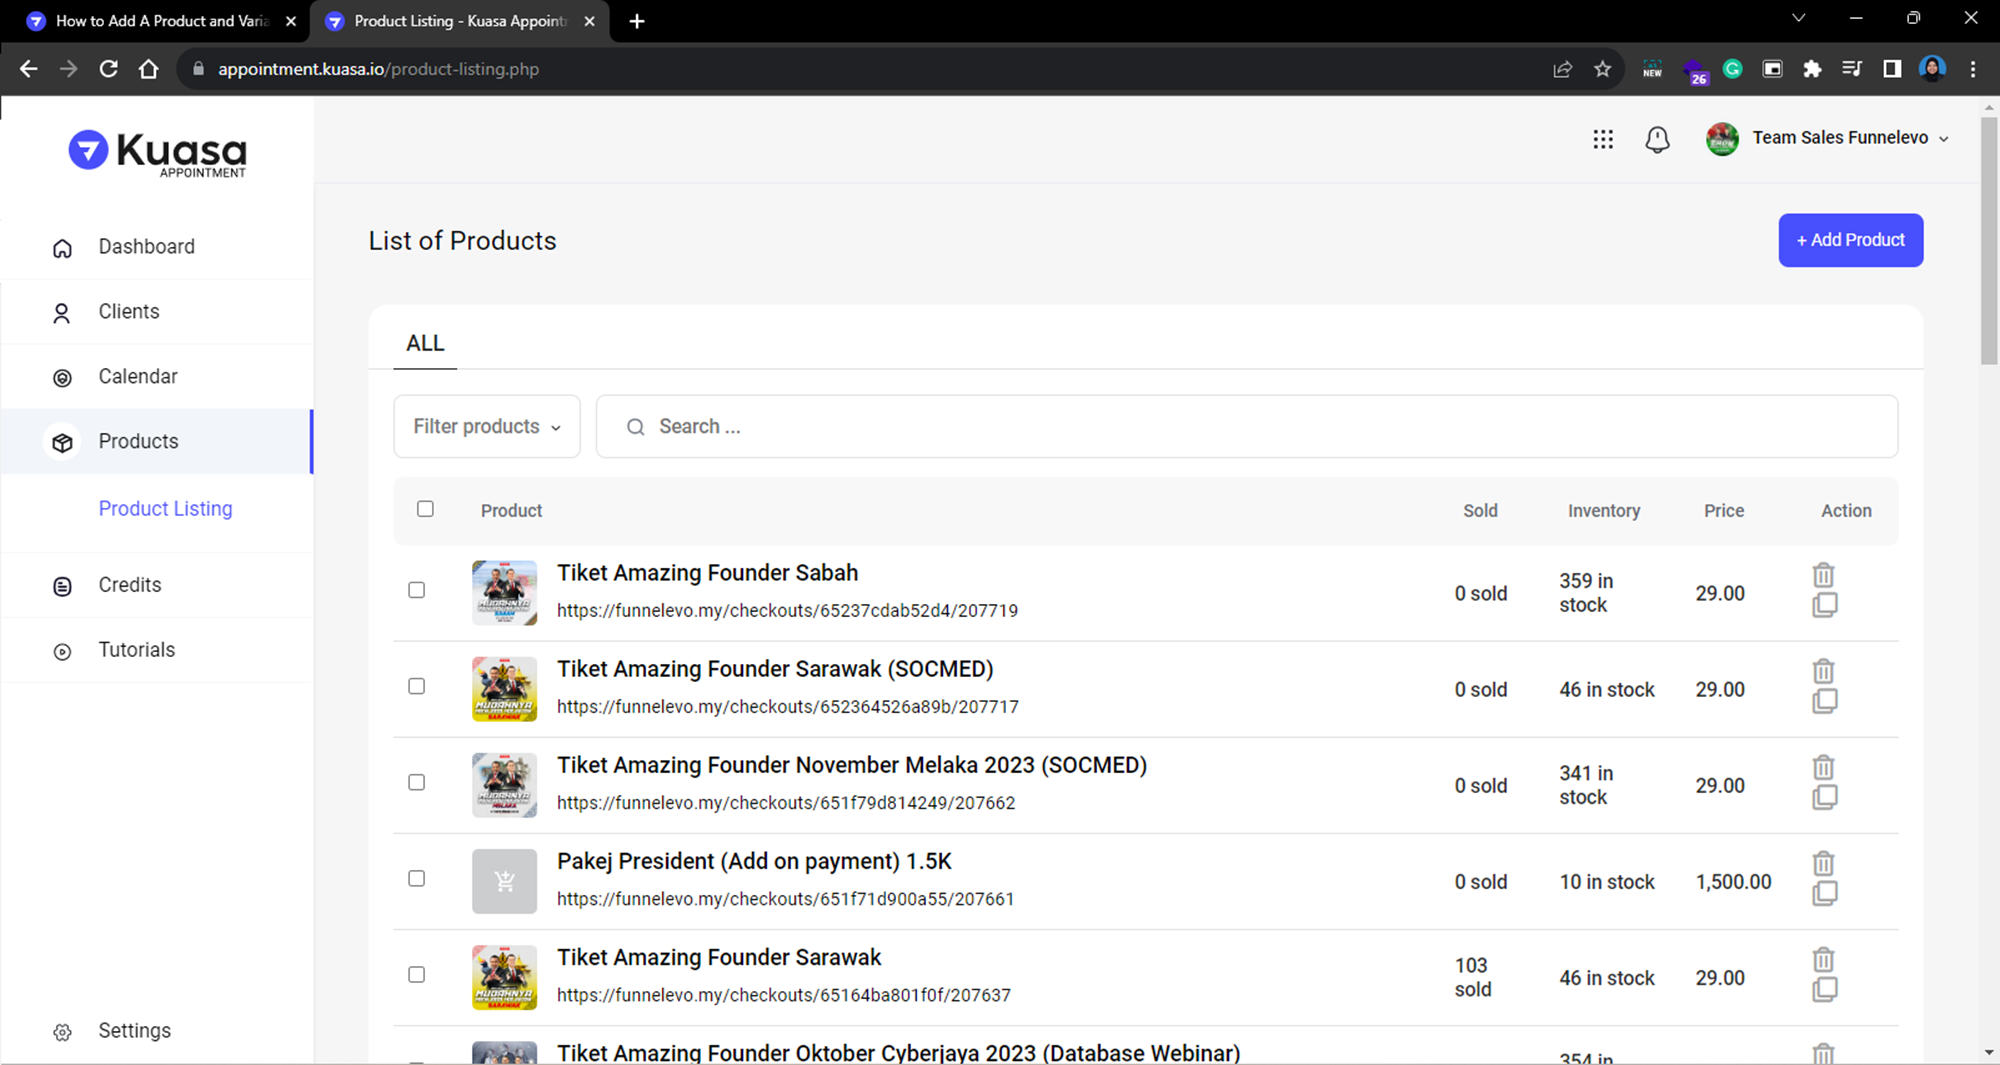
3. On the left sidebar, click **Product** and choose **Product Listing**.
4. After that, on the right side click **Add Product**.
5. Fill in the product name (**Title**) and **Description**.
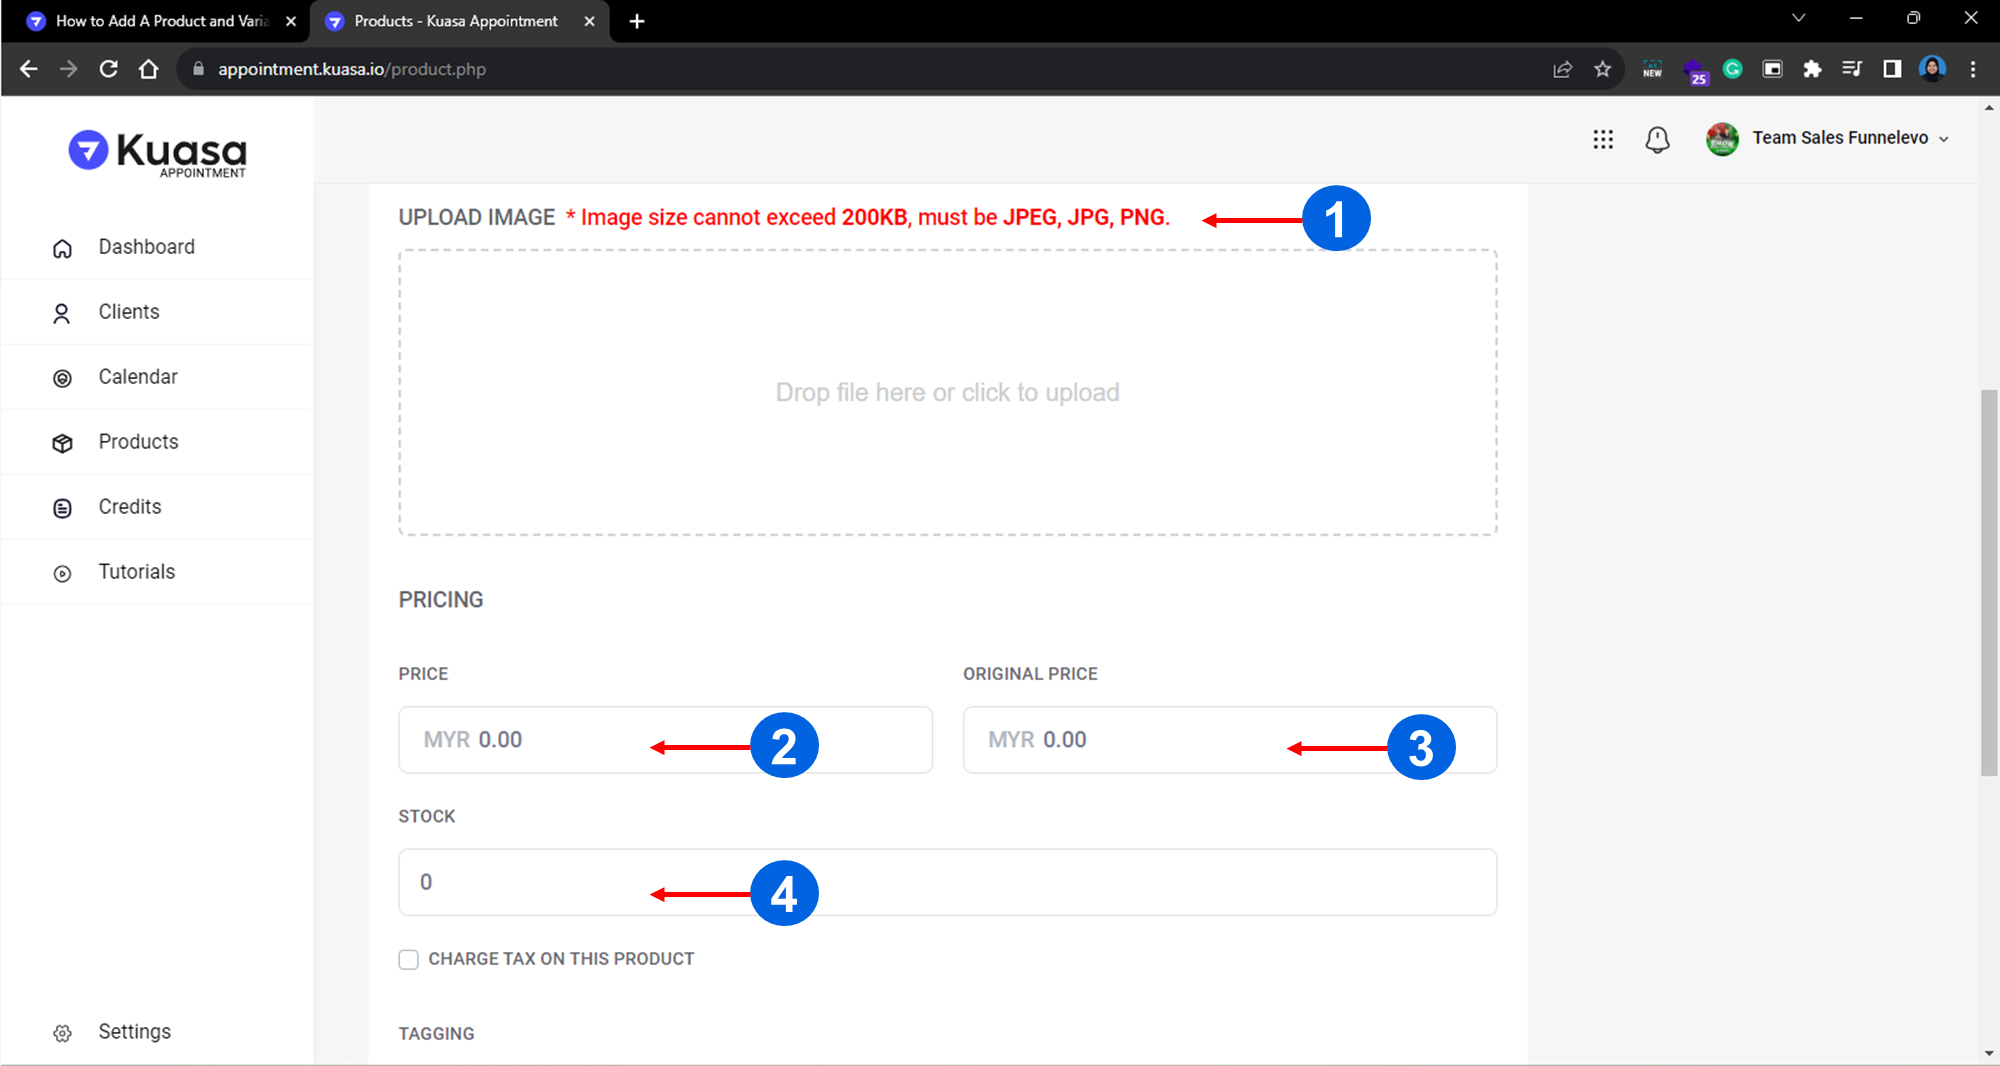
6. Scroll down and fill in the **picture**, **price** (discount price if available, if not, fill in the original price only), **original price**, and product **stock**. If you want to charge tax on this product, you may tick the box. If not, you may skip this section.
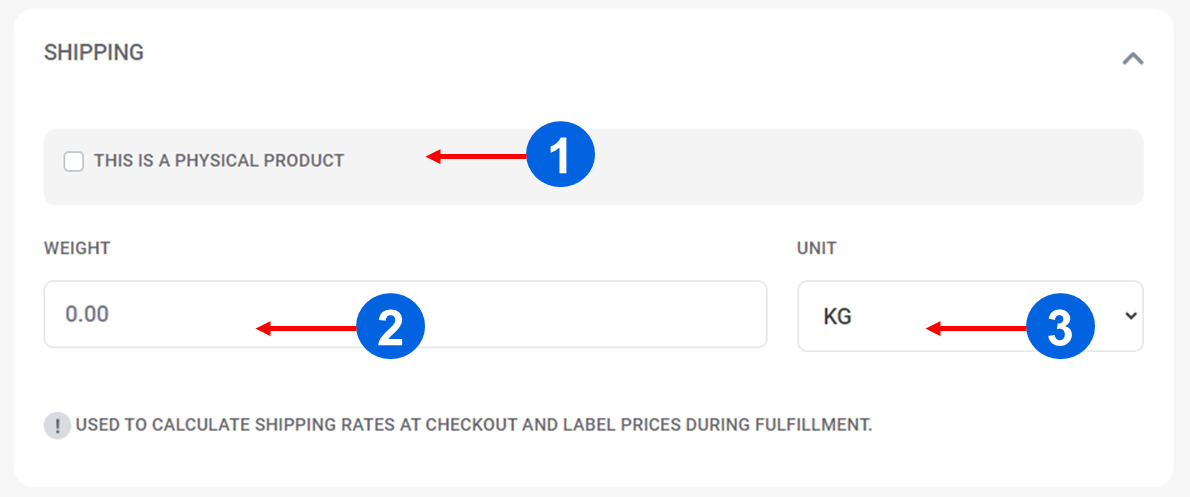
7. For the shipping part, if your product is a physical product, tick the sign ✔ , and the product weight.
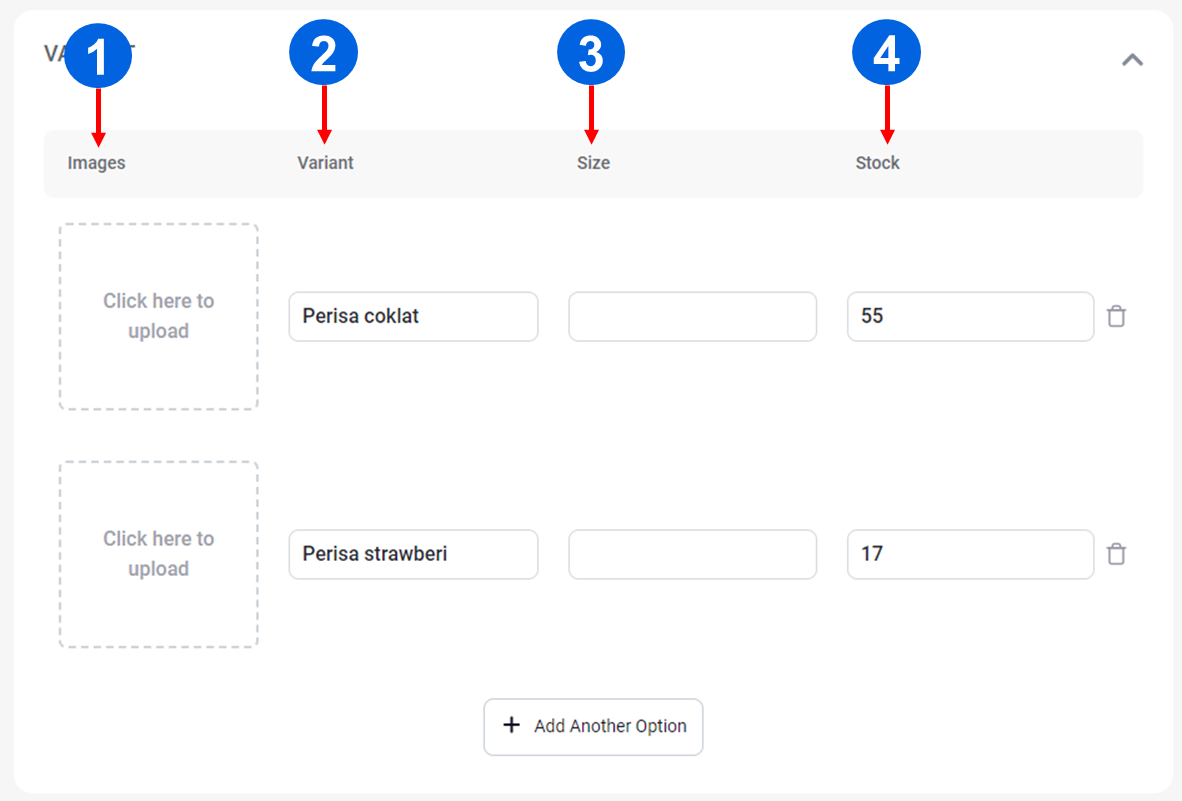
8. Fill in the variant and stock if your product has different variants (For example: Chocolate flavor, Strawberry flavor, Size S, Size M, etc.) and click Save.
9. Congratulations! You have successfully added your product.